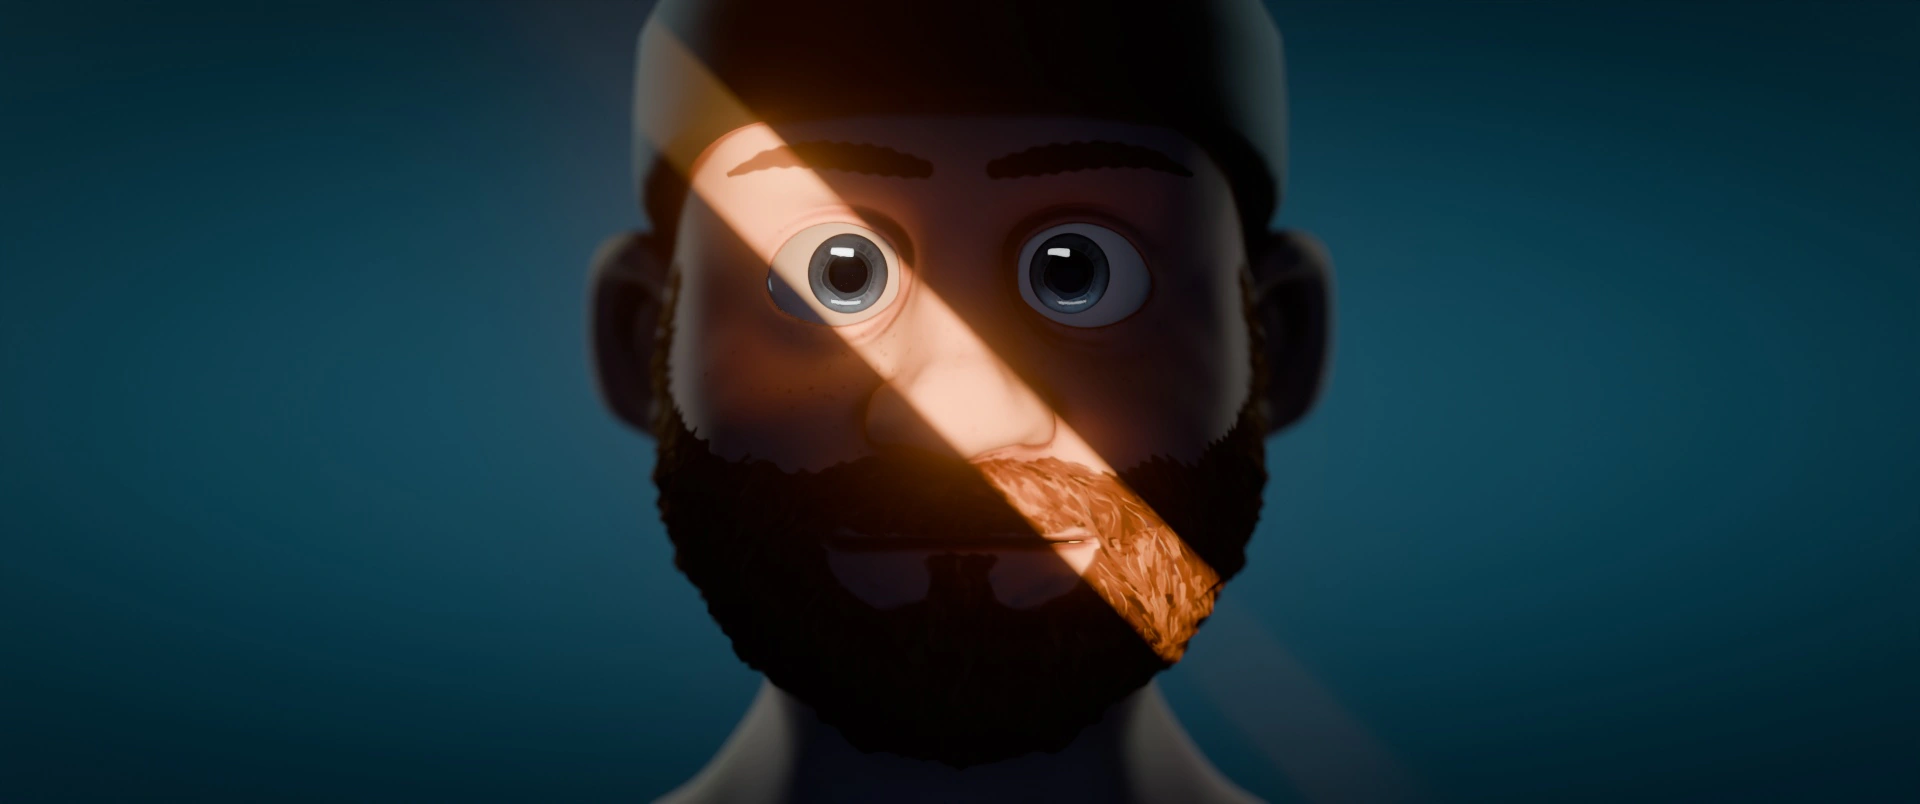
Devlog · Real-time character · November 2026
Echoes of the Soul
A cartoon head that shows emotions and talks. First rigged, painted and lit in Blender, then driven by a webcam in the browser, and finally rebuilt faithfully in Unity HDRP, where an iPhone or a webcam lends it a face.
- Period
- 12 → 15.11.2026
- Rendering
- Cycles · three.js · HDRP
- Rig
- 52 ARKit shape keys
- Capture
- iPhone · MediaPipe
- Reading
- 15 min
Echoes of the Soul started from a simple idea: a 3D face that reacts to the face of the person in front of it. An early sketch already existed: a glass donut that changed colour with the detected emotion. It needed a real face.
This one is a 38,294-vertex cartoon sculpt, bearded, in a beanie. In four days it gained a complete mouth, an expression library, a painted skin computed texel by texel, three cinematic lighting setups, a web page that drives it with a webcam, then a port to Unity HDRP where an iPhone captures it. Every step can be replayed by script: nothing is tuned once by hand.
This devlog follows the order of the project, with the measurements, the dead ends and what is left to do.
Chapter 01 / 07
A face that talks
The sculpt already had its 52 ARKit shape keys and a control rig generated by Faceit. It lacked the inside of the mouth, a neck, ready-made poses, and a blink that does not tear the eyelid.
- 38 294
- Vertices in the sculpt, a single watertight mesh.
- 52
- ARKit shape keys, compatible as-is with iPhone capture.
- 14 + 10
- Expressions and visemes in the pose library.
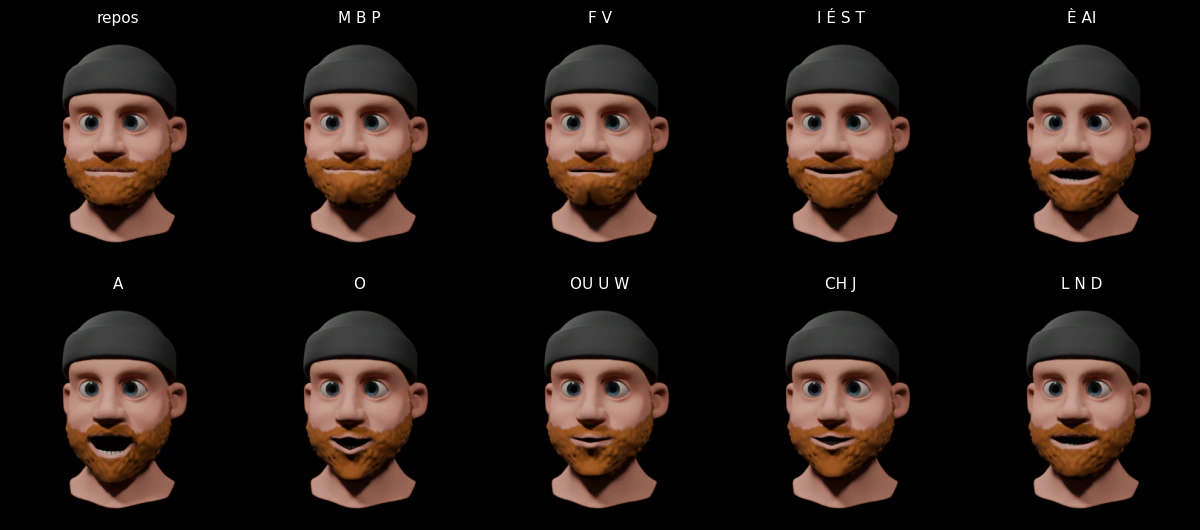
First false diagnosis: with the mouth open, a skin-coloured surface showed between the lips. The mouth looked sealed. Listing the vertices on the median plane, though, there were points 6 cm behind the lips: a complete cavity, painted the same colour as the skin. To find it, each candidate vertex casts 40 rays; those with more than 72 % landing back on the head are “inside”. Result: 4,100 vertices, a 13.6 cm wide cavity.
The teeth are generated along an arch fitted to the wall measured by ray casting: the sculpted cavity narrows towards the throat, where a real dental arch widens. The lower teeth and tongue follow the jaw through the rigid rotation recovered from the jawOpen shape key by the Kabsch algorithm: 22.1° with a mean residual of 1.96 mm.
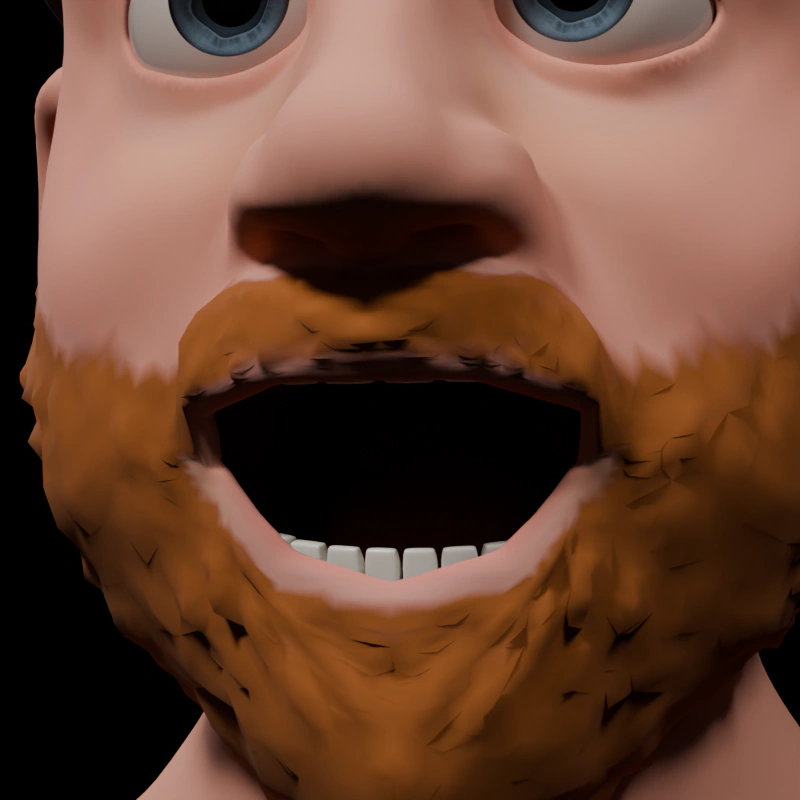
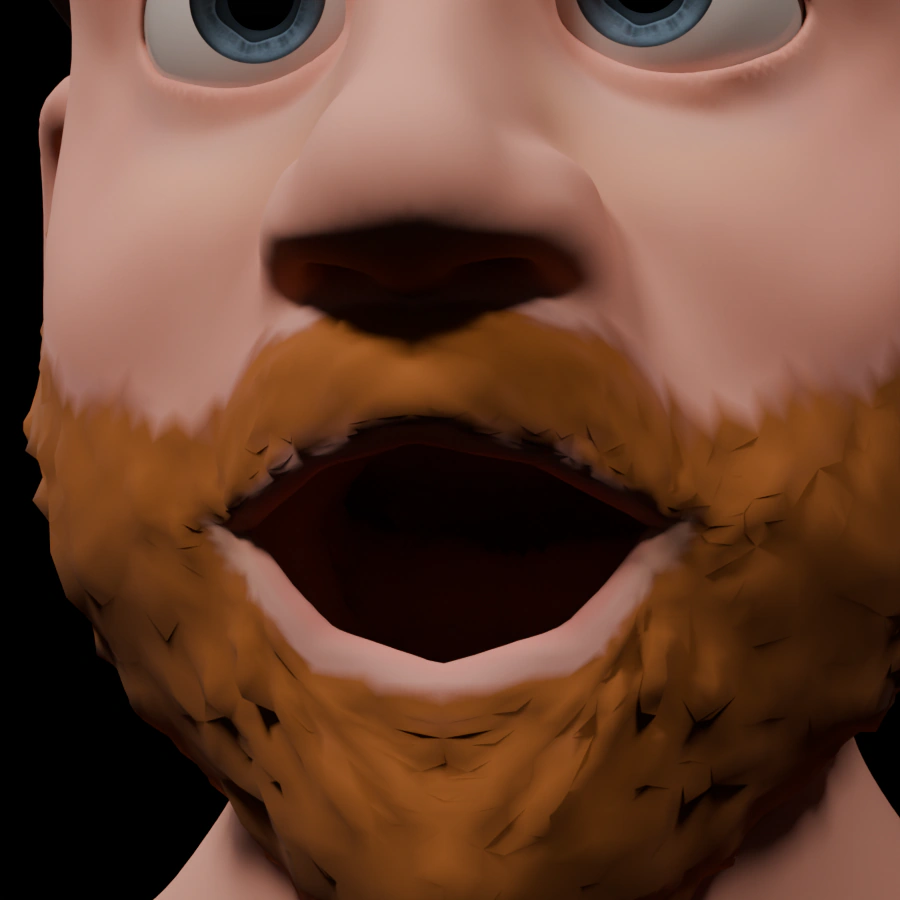 BeforeAfter
def kabsch(P, Q):
    """Meilleure rotation + translation (moindres carrés) envoyant P sur Q."""
    cp, cq = P.mean(0), Q.mean(0)
    U, _, Vt = np.linalg.svd((P - cp).T @ (Q - cq))
    d = np.sign(np.linalg.det(Vt.T @ U.T))
    R = Vt.T @ np.diag([1, 1, d]) @ U.T
    return R, cq - R @ cp
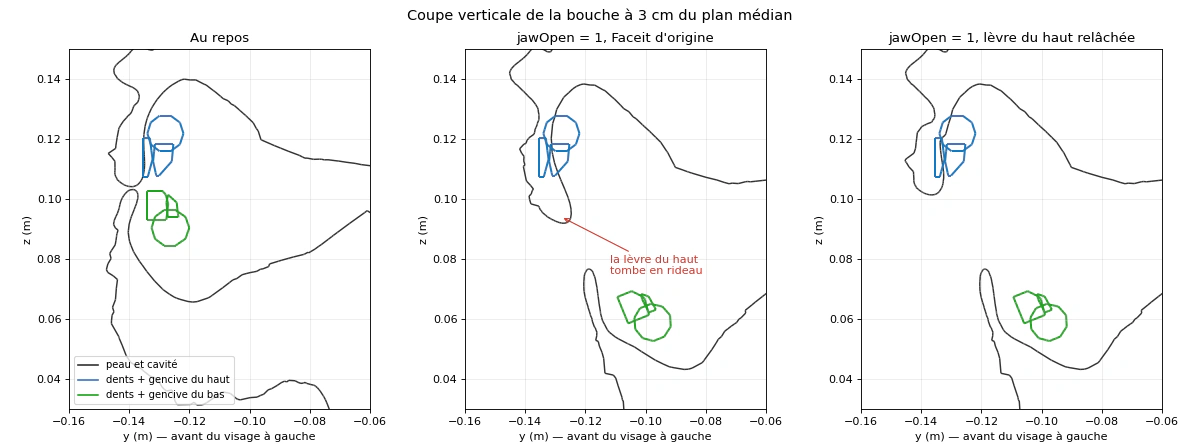
The real defect only showed on a vertical cross-section of the mesh: on opening, the upper lip dropped by more than a centimetre and slid back into the teeth, like a curtain. Across the 892 vertices dominated by the upper-lip bones, it followed the jaw at 28 % on average. I attenuate jawOpen where those bones dominate and carry the exact difference into mouthClose: the sum of the two does not change, nor does the closed-lips pose. Tracking drops to 7 %.
The poses are written as ARKit values, then converted into controller positions by reading Faceit’s drivers, of the form (var / D) * amp. A first set, approved on 320 px thumbnails, distorted the face at full size. Version 2 follows three rules: the dominant shape stays under 0.6, three or four shapes at most per area, and no eyeBlink outside closed-eye poses. The 10 visemes only touch the 25 mouth channels: they layer over an emotion without erasing it.
The original blink “pulled on the mesh”. A shape key moves each vertex in a straight line: halfway, the chord cuts through the eyeball (minimum skin radius at 0.86 times the eye’s), and once closed the eyelid is a flat sheet. I lay the closed skin on a spherical shell at 1.13 R, and a second shape key, eyeBlink…_arc, driven by 4·b·(1−b), rounds the lid halfway.
The hard part was telling which vertices are visible skin: two criteria based on normal orientation failed, because in a fold the orientation does not say which side you are on. The right test is visibility: does a ray cast forward escape without hitting the head or the eyeball? The detected edge then sweeps its expected 55°.
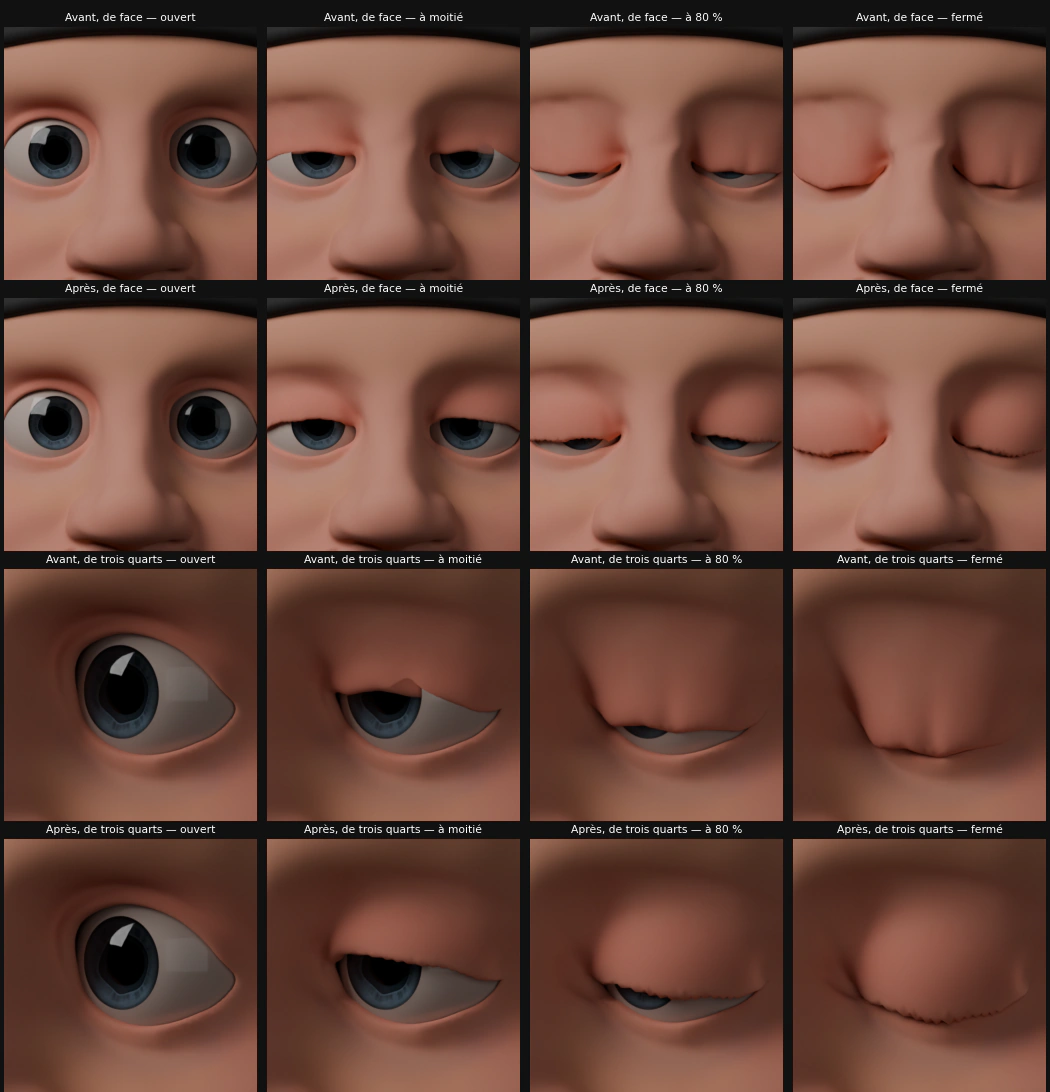
for (const [morph, i] of pairs) inf[morph] = value(i);
for (const [morph, i] of arcs) inf[morph] = 4 * value(i) * (1 - value(i));   // vaut 1 à mi-course
Chapter 02 / 07
Painting without a brush
The target was the Arcane look: soft, painted modelling, graphic strokes, no shiny areas. A shader is not enough. Everything that makes a painted face is drawn, and a drawing is a texture. So every texture is computed by script, from the geometry.
- 01
Every texel knows its place
Triangles are rasterised in UV space: each texel knows its 3D position and normal. We no longer paint on an image but on the head, and UV seams drop out of the problem.
- 02
Measure the shape
A crevice is low ambient occlusion: two flat shadow shapes. An upward-facing bump, positive curvature: a lighter plane. The bottom of a fold, strong concave curvature: an accent stroke.
- 03
Strokes that follow the form
30,000 ellipses placed in 3D, oriented along the occlusion’s isolines. Each stroke takes the colour under its centre: straddling a shadow, it frays the edge on its own.
| Layer | What the script measures | What it paints |
|---|---|---|
| 1. Base | Skin measured near the mouth | Tone saturated at 0.85 |
| 2. Zones | Nose tip, cheeks, ears (extreme x) | Reds, yellow forehead, cool jaw |
| 3. Shadows | Per-vertex occlusion, 40 rays over 3.5 cm | Two flat shapes with noisy edges |
| 4. Lights | Mean curvature × orientation | Warm planes, 0.22 opacity |
| 5. Accents | Strongly concave curvature, occlusion < 0.95 | Red-brown at the bottom of folds |
| 6. Strokes | Occlusion gradient | 30,000 ellipses from 3 to 9 mm |
| 7. Eyebrows | Curve projected onto the skin | Mass + 190 tapered hairs |
iso = np.cross(nor, grad_ao)                 # tangent à la surface, perpendiculaire au gradient
hor = np.cross(nor, (0, 0, 1))               # horizontale sur la surface
w_iso = smooth(2.0, 12.0, |grad_ao|)         # forme marquée -> isoligne ; forme plate -> horizontale
flow = normalize(hor * (1 - w_iso) + iso * w_iso)
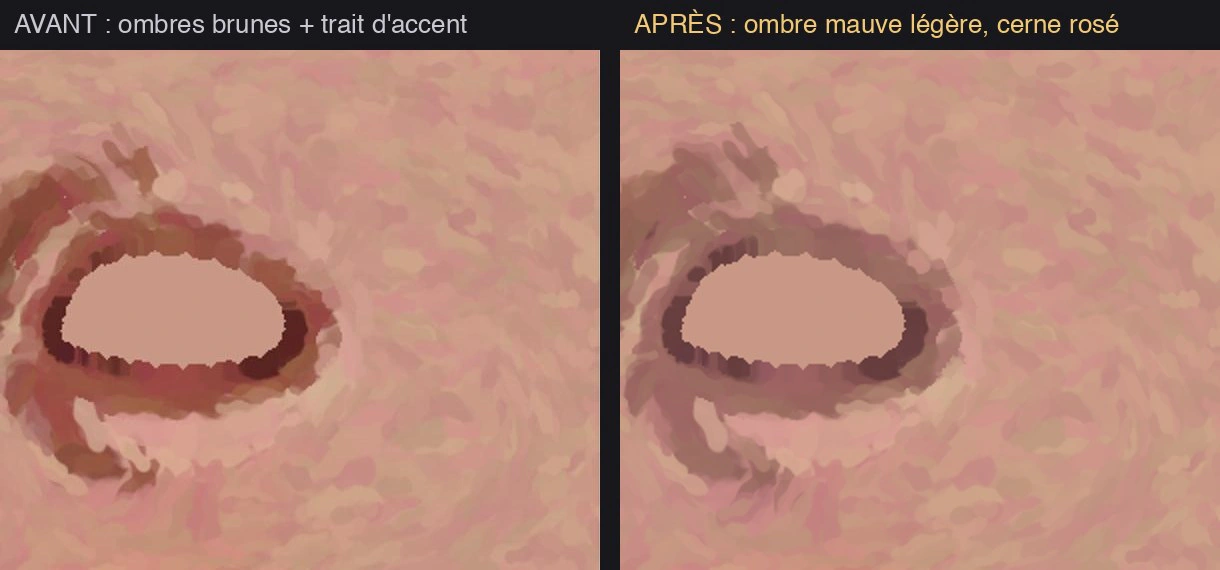
Two iterations out of twelve went into correcting assumed values: curvature thresholds twenty times too low (the head ranges from −31 to +48 m⁻¹), then an eyeball radius underestimated by half. The bright red ring around the eyes came from the eyeballs, counted as occluders. Around the eye, the shadow turns mauve-grey and a light under-eye tint, at 0.15 opacity, replaces the brown.
One last defect had nothing to do with painting: an empty zigzag band under the jaw. 2,354 faces had degenerate UVs, one-face-wide strips along the seams. Rather than re-unwrapping (the islands shattered, then overlapped), each face is attached to the neighbouring island through a 3D → UV affine map fitted by least squares on its healthy vertices. All of it in a UVMap_painted copy: the original stays intact.
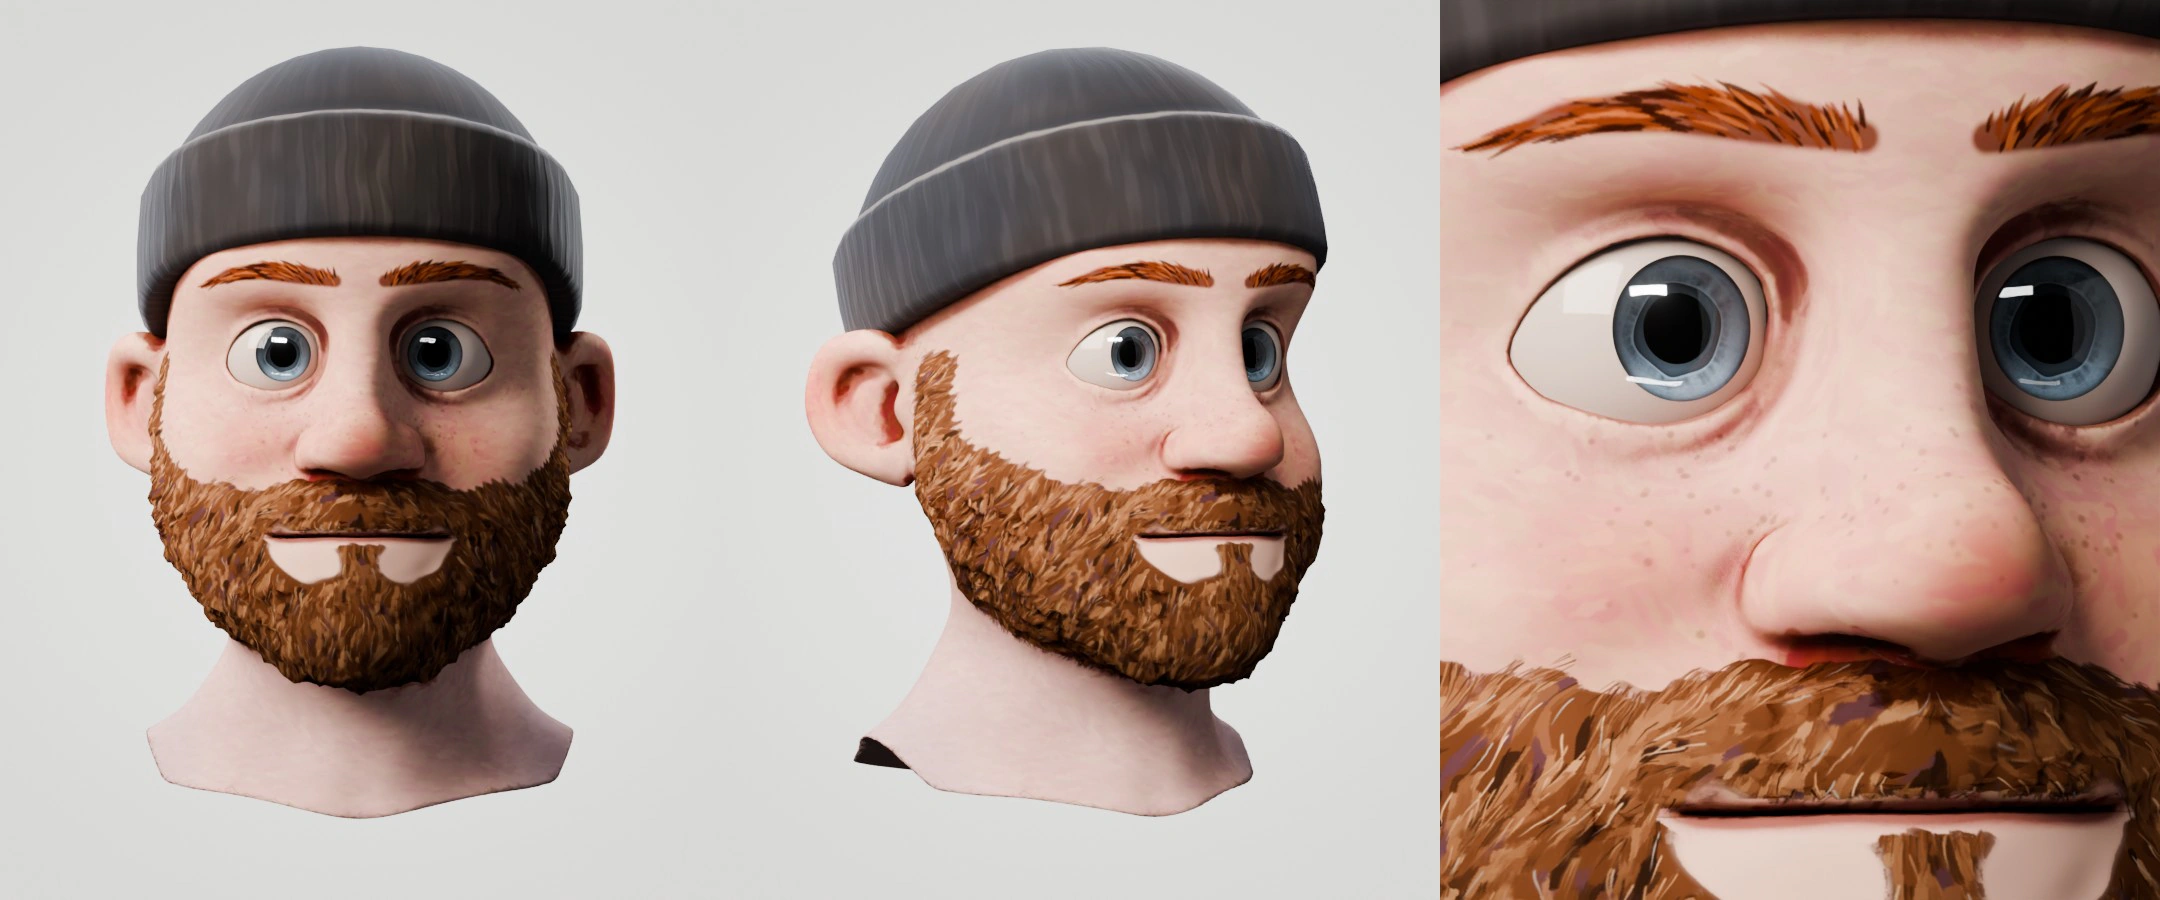
The beard has its own 4096² texture, where a texel is 0.17 mm. A 3D growth field (a fan from the mouth, the moustache swept to the sides) is projected into the tangent plane, then turned into a UV direction by a 2 × 2 system. Six stroke passes advance all together in numpy, from broad locks to single hairs.
To feel the hand, the background passes go through a 0.6 mm Kuwahara filter inside the texture, not in compositing: the strokes stay stuck to the surface when the head moves. Fine hairs and the border are laid afterwards, crisp, over the flat areas.
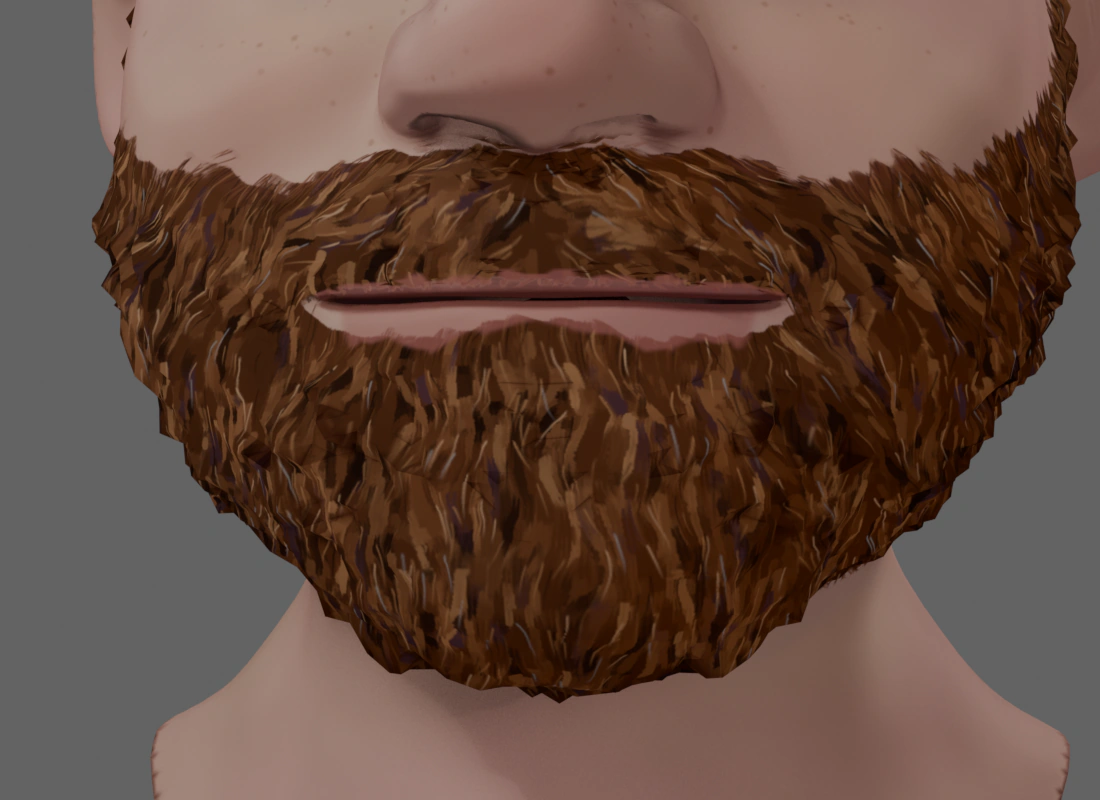
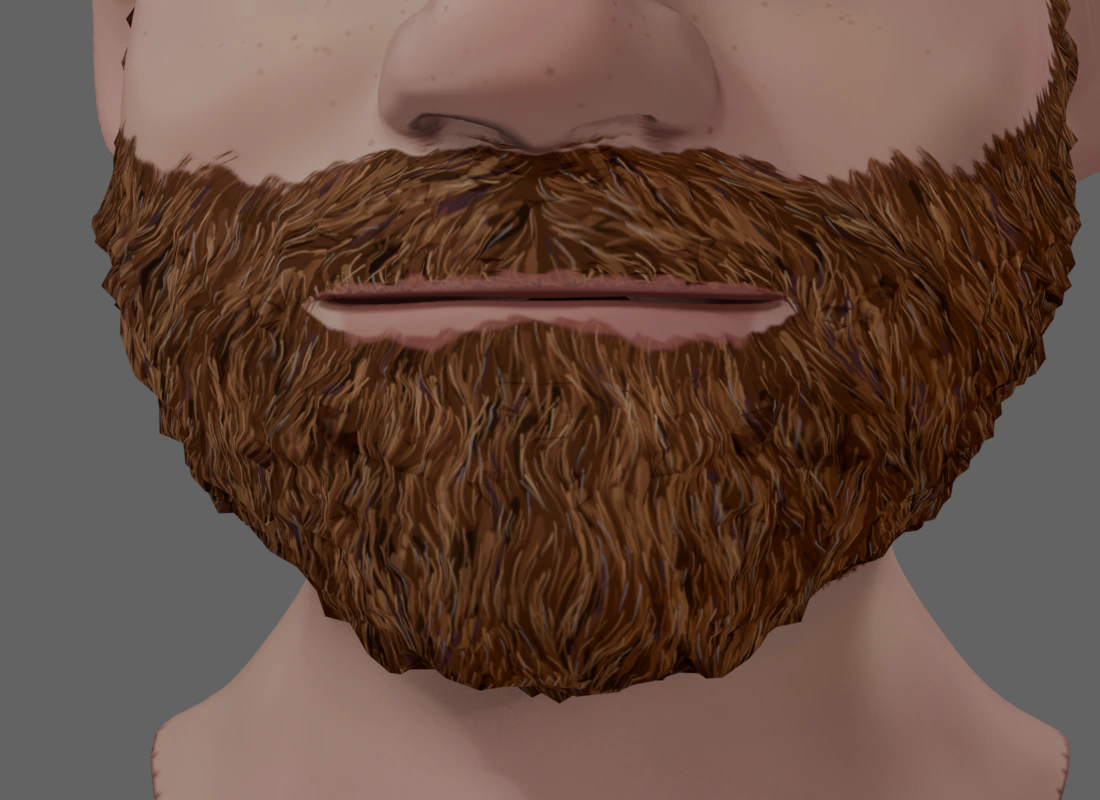 Strokes onlyKuwahara
for i, (dy, dx) in enumerate(corners):                   # les quatre quadrants autour du texel
    cnt = np.maximum(n_box[dy:dy + h, dx:dx + w], 1e-6)
    mean = l_box[dy:dy + h, dx:dx + w] / cnt
    var = l2_box[dy:dy + h, dx:dx + w] / cnt - mean * mean
    better = var < best
    best[better] = var[better]
    pick[better] = i                                     # le quadrant le plus calme gagne
A ginger outline ringed the nostrils. Three fixes on the painting side did nothing; the right question was the reverse: which triangles read the painted area? 782 triangles far from the beard, with degenerate UVs, landed right inside it. A mesh attribute that says where the beard is allowed to appear fixed it in one pass.
Chapter 03 / 07
A band of light
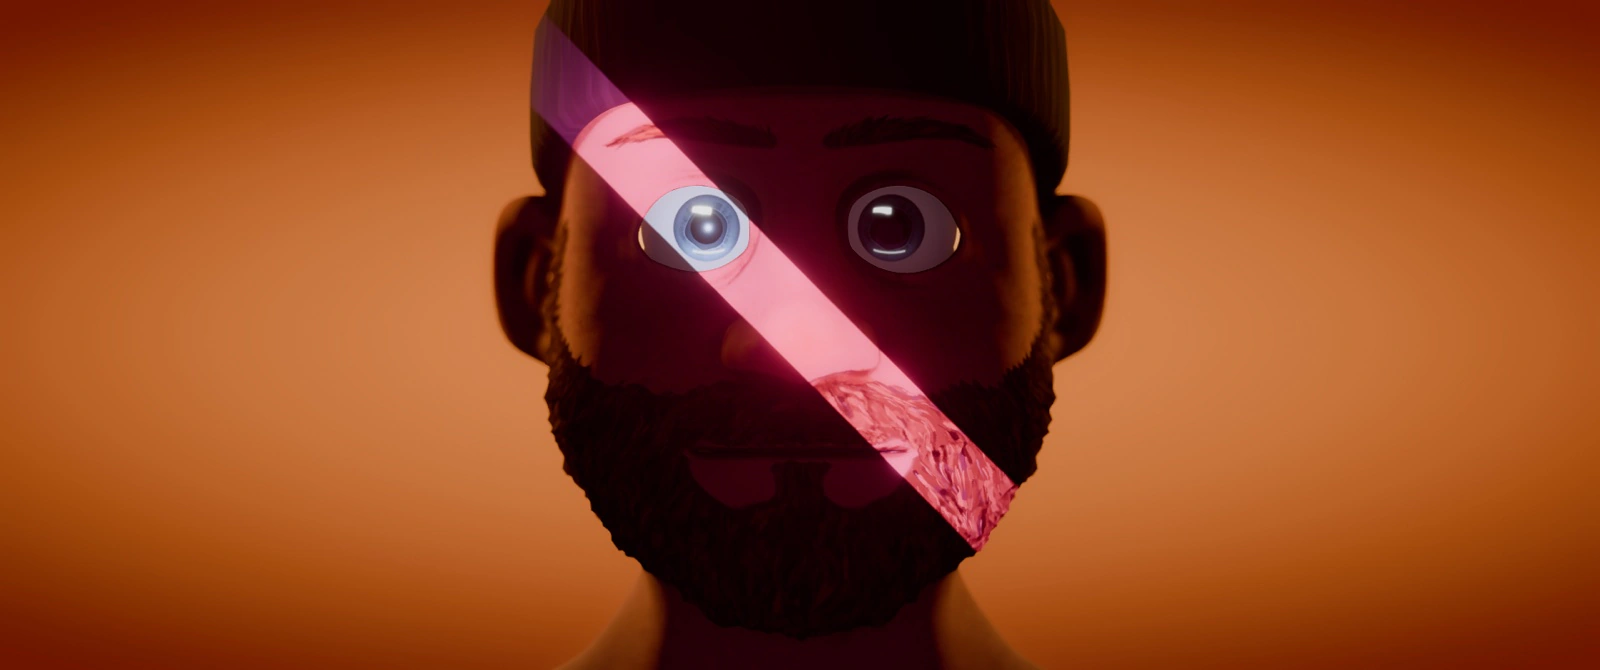
A shot inspired by Arcane: a face in darkness, crossed by a band of magenta light, against an orange background. The band is real light going through a slit, not a texture. The rig came quickly; the eyes took everything else.
| Light | Role | Setting |
|---|---|---|
| lgt_slits_face | The band | Magenta spot 100 W, +3 stops, 0.7 mm radius |
| gobo_slits_face | The slit card | 15 × 15 cm, 25 cm from the spot, invisible to camera |
| lgt_rim_orange_L / R | Separate head from background | 25 × 80 cm areas, 20 W |
| lgt_fill_magenta | Burgundy shadows, not black | 80 cm area, 10 W, −3.3 stops |
| lgt_eyes_catch / _low | Wet eye highlights | 38 × 10 and 70 × 5 cm rectangles, seen in reflection only |
The slits are not drawn: each target point on the face is projected onto the card in the spot’s frame, and the card is cut by two planes. To keep a straight band straight over relief, the spot sits on the camera → face line: the light plane contains the camera, and seen edge-on the sheet stays a line. The orange background must not light the face: the world separates what the camera sees (Is Camera Ray) from the ambient light, at 0.025.
Then the eyes. Under the magenta band, the irises came out pink. A blue lamp reserved for the eyes through light linking, then a band that changes colour over them: still pink, then red. The culprit was bloom: being additive, it lays a veil the colour of the bright areas, and on a black pupil in the middle of a pink band, that veil is the colour. The fix shields the eyes from bloom with an object mask in compositing.
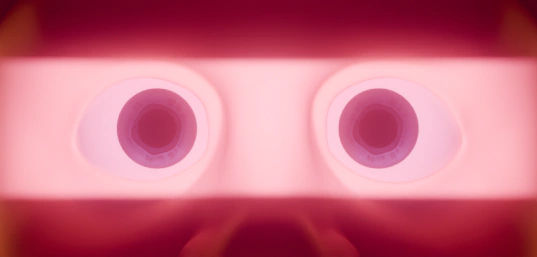
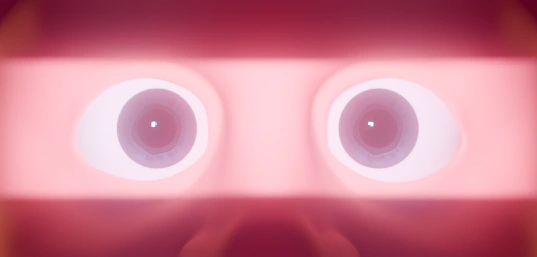
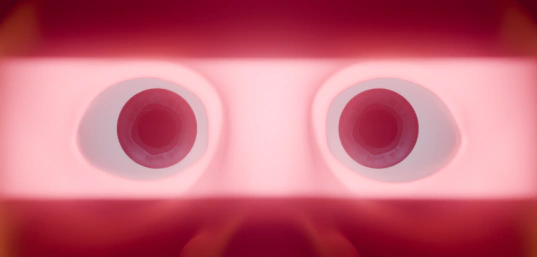
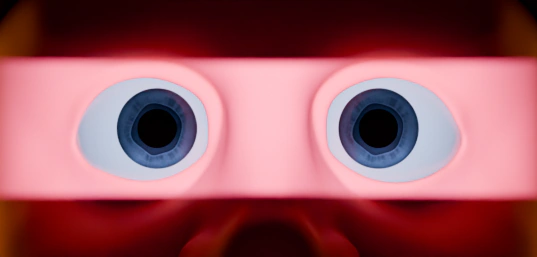
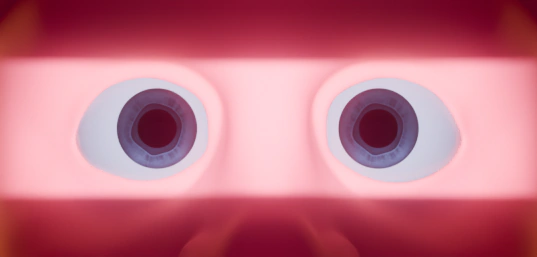
Under the magenta band, pink irises.
Pl. 08Five attempts to keep blue eyes in magenta light.
résultat = image + glow × (1 − masque_yeux × 0,75)The eyes then looked flat. The cornea is already roughness-0 glass, but a mirror only shines if it has something to reflect, and the 0.7 mm spots make a highlight smaller than a pixel. Two extended sources exist only to be seen in reflection: a bar to the upper left of the gaze, and a low strip whose reflection draws the wet arc of the tear film.
A trap along the way: those sources were lighting the eyes too, even with their Diffuse factor at 0. In Cycles 4.5, ray visibility on the light object is what decides. It took switching each light off one by one to see it.
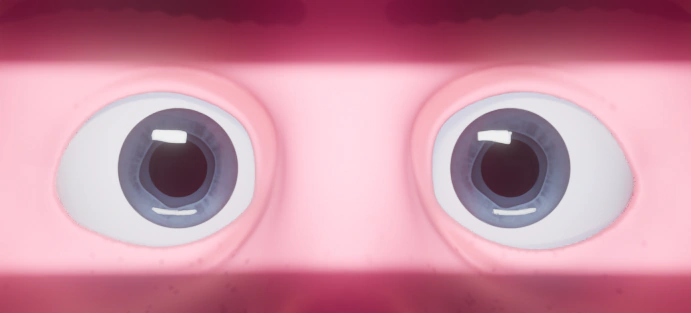
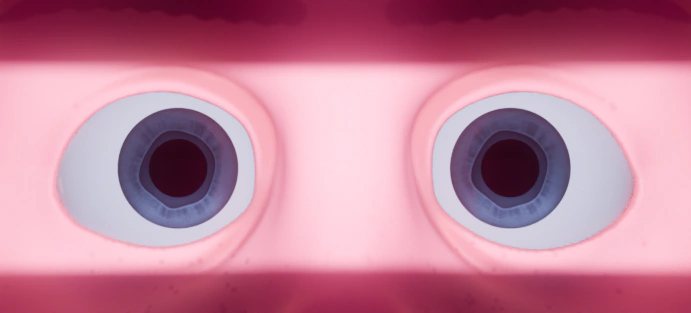 No highlightBar + arc
def reflect_only(obj):
    obj.visible_diffuse = obj.visible_transmission = obj.visible_volume_scatter = False
    obj.visible_glossy = True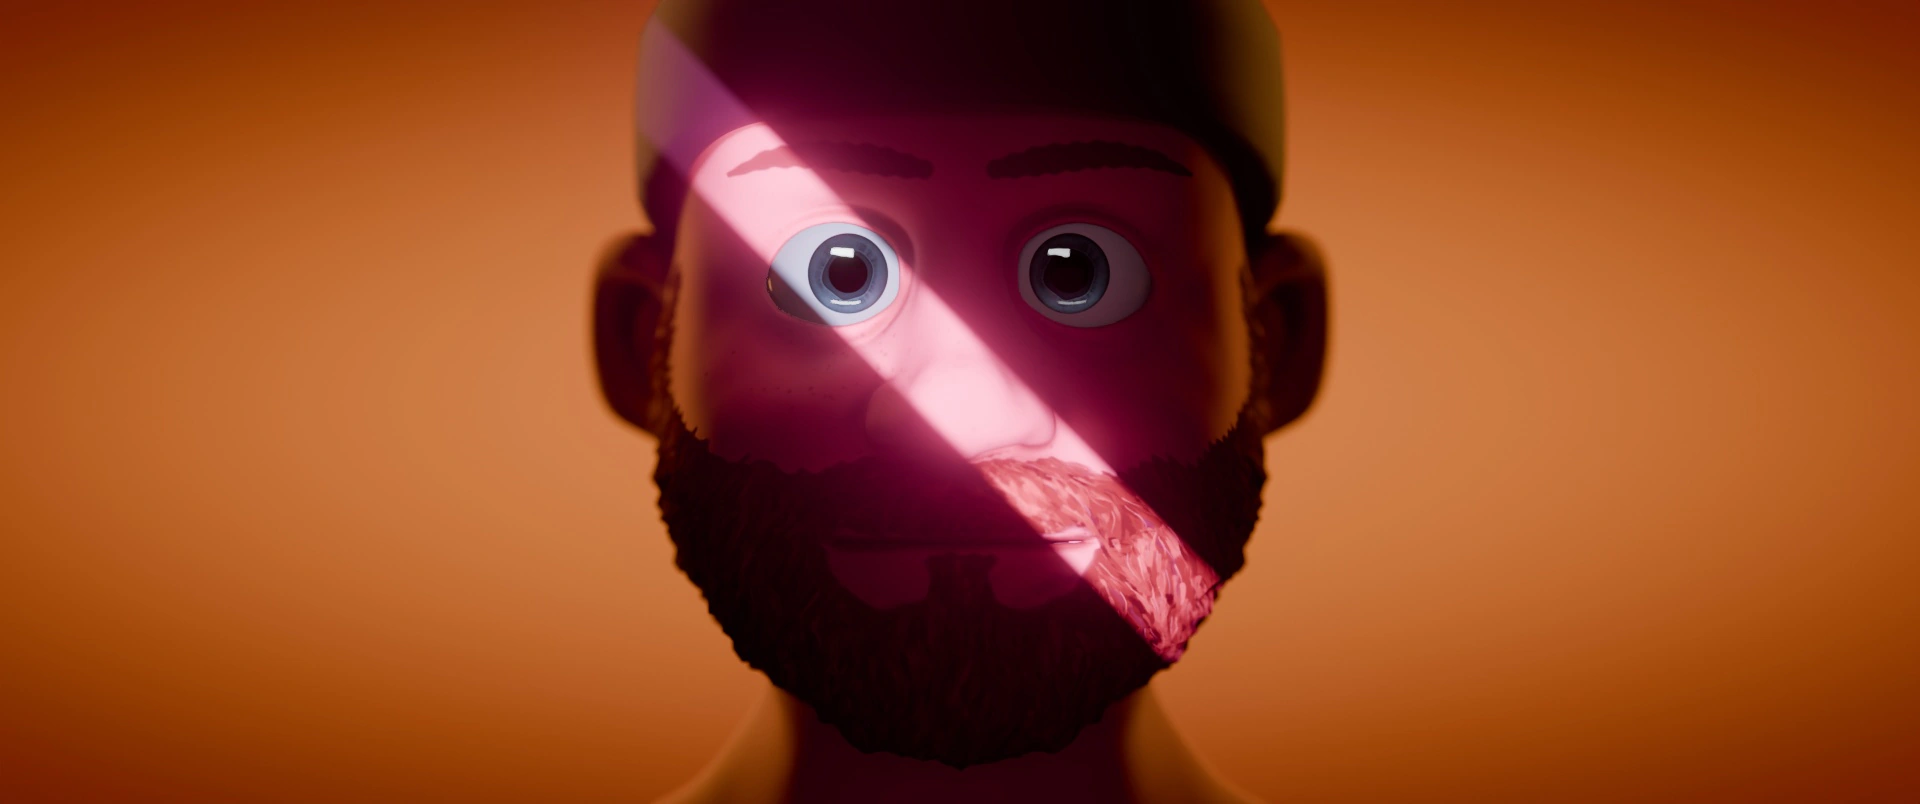
Chapter 04 / 07
Blue night, golden beam
The Arcane shot draws its contrast from two sources: value (black face, very bright band) and hue (magenta against orange). The first makes the style, the second the tension. For a calm shot, I keep one and drop the other: neighbouring, low-saturation hues, and a single warm touch.
Same frame, same head, same gobo. Only the lamps change: amber band #FFB86A, pale cyan rims, slate-blue fill, teal background fading to near black. Final render: 1920 × 804, 512 samples, 9 min 23 s.
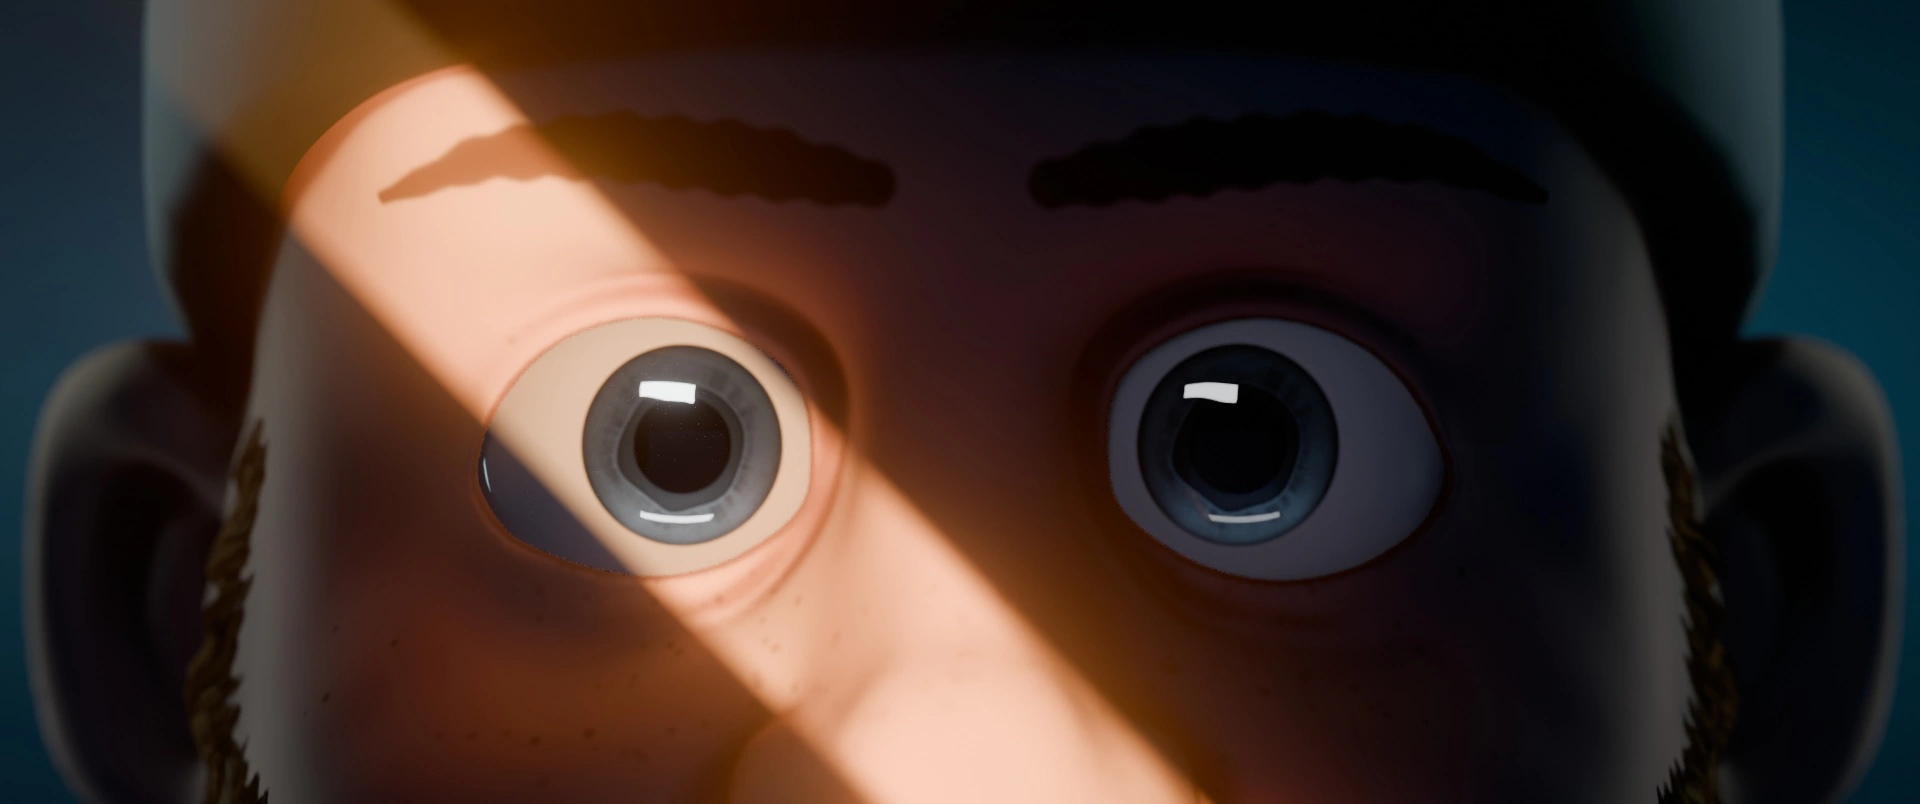
Eye in the band
Changing hue forces you to redo the energy. Magenta and orange are dark colours: at equal power, ivory or cyan emit far more luminance. The first version, with the original energies, burned the band to white. Band: 100 W → 55 W.
Eye in shadow
Each eye has its own pair of highlights: full power in the band, −2 and −3 stops for the other, and a shared fill at −2.5 stops. Not as bright as the lit eye, not a black hole either.
Painted beard
In the band, the hair-by-hair beard finally reads. Elsewhere, the cheek shadow measures (28, 12, 12): a hue does not exist in near-black, and only a stronger directional fill can tint the shadow without flattening the form.
The haze took three positions. In the world, it extends to infinity and swallows the background. In a box from the camera, it veils the face and adds noise in the eyes. Kept: a layer from 30 cm in front to 60 cm behind the head, with the eye-highlight lights excluded. The eyes regain their sharpness and the beam stays visible in the air under the chin.
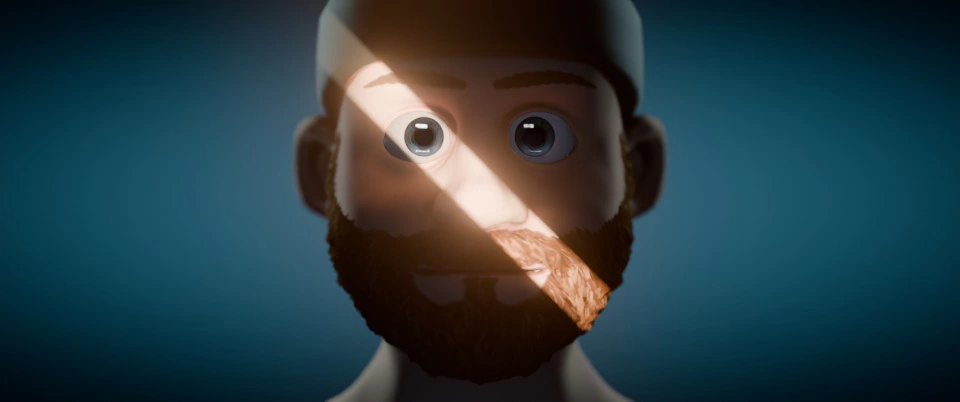
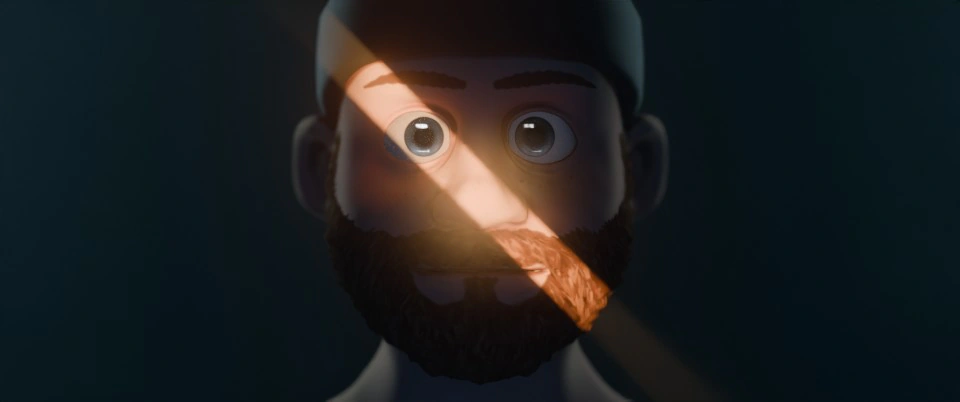
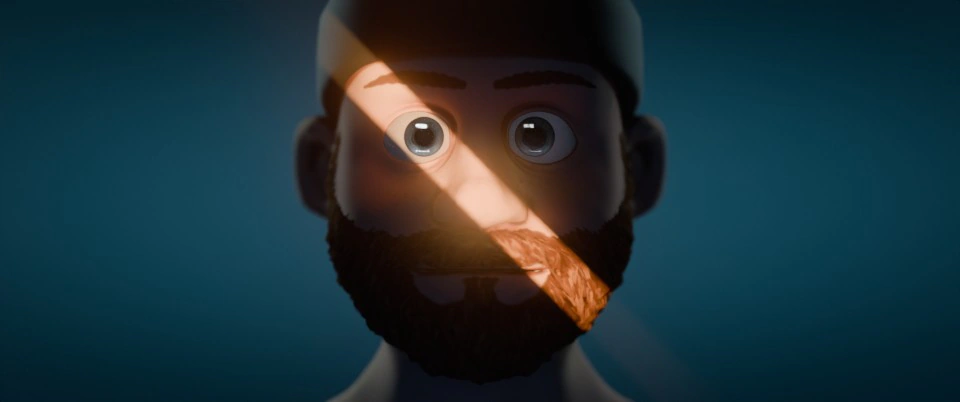
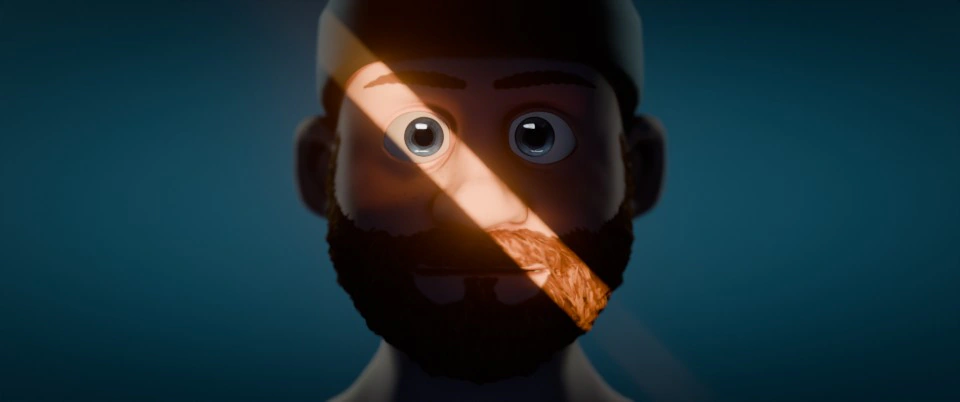
New hues, old energies: the band burns out.
Pl. 12Half-resolution test renders, 32 samples, 25 to 35 s each, without ever saving the file.
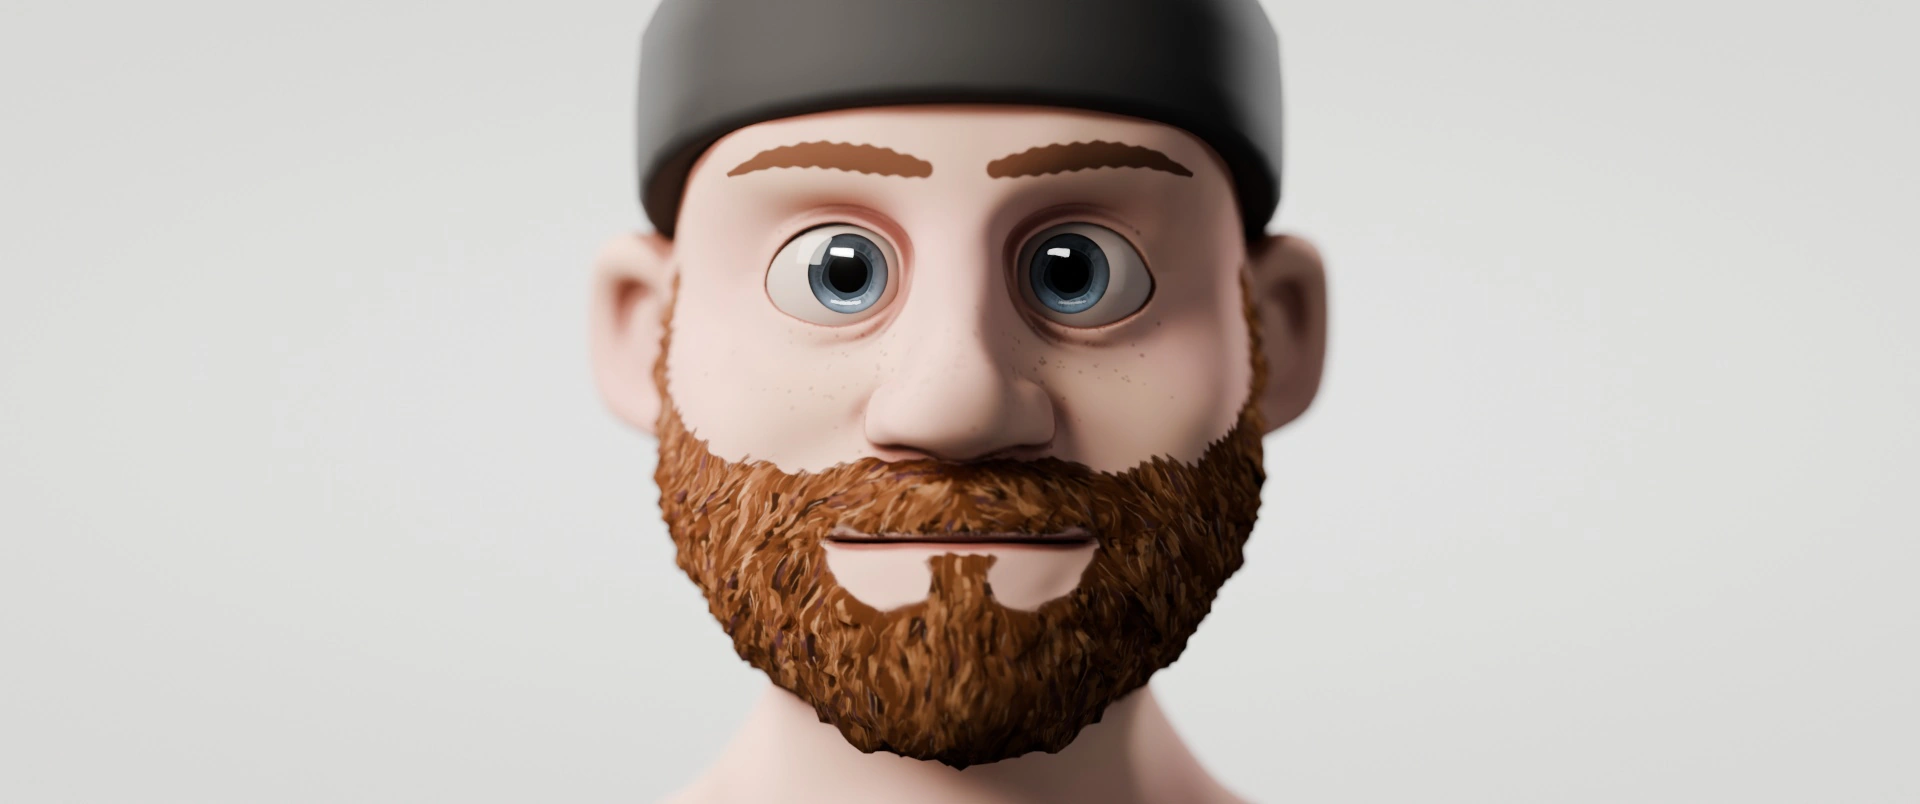
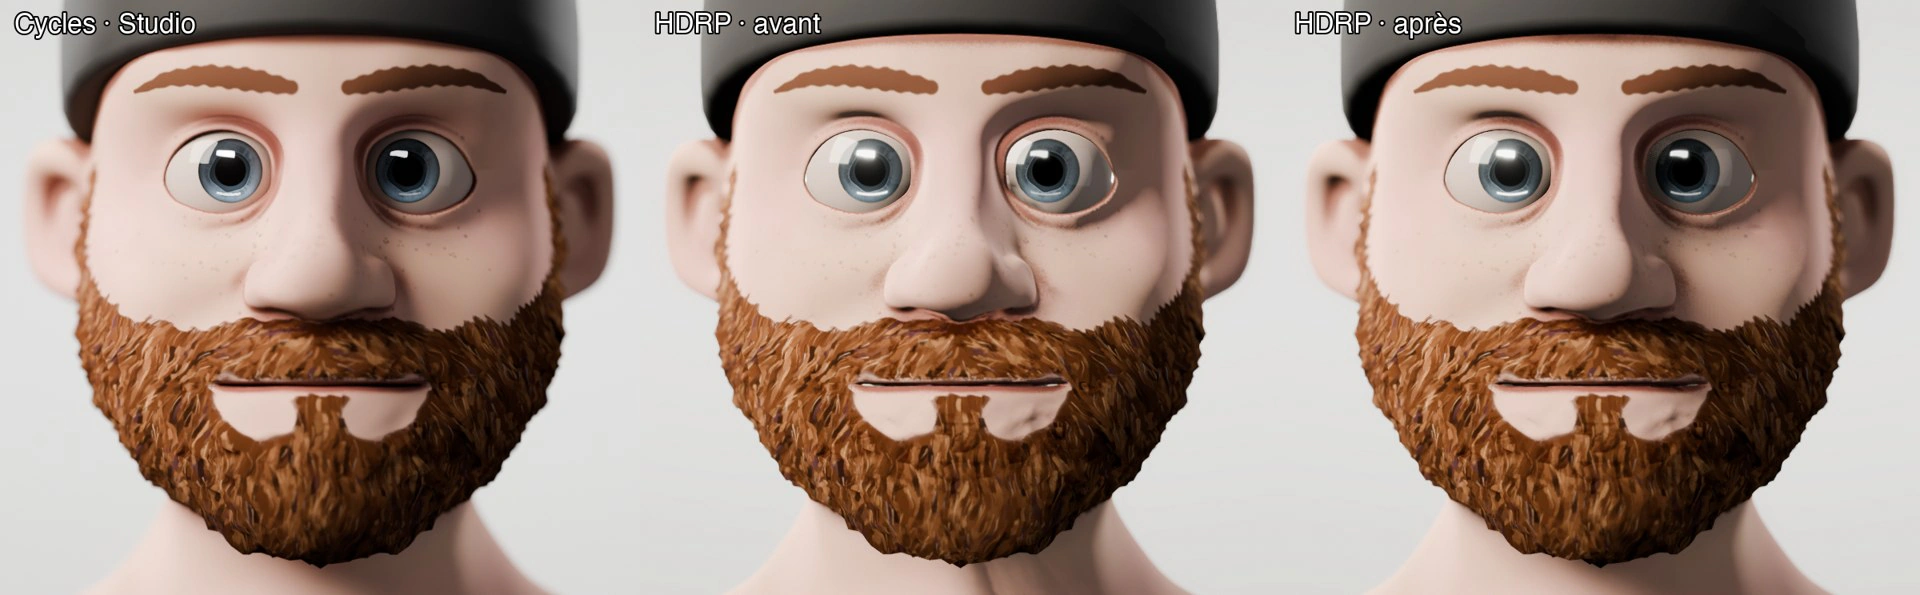
The lighting setups live side by side in the same .blend: Scene.copy() makes a linked copy, the head, rig and 24 poses are shared, and only the lights, world and camera change. A third setup, Studio, is for judging the model without colour: softbox key, fill three stops lower, off-white background, AgX Medium High Contrast.
Magenta band, burnt-orange background, burgundy shadows.
Pl. 14Three scenes, one file, the same camera.
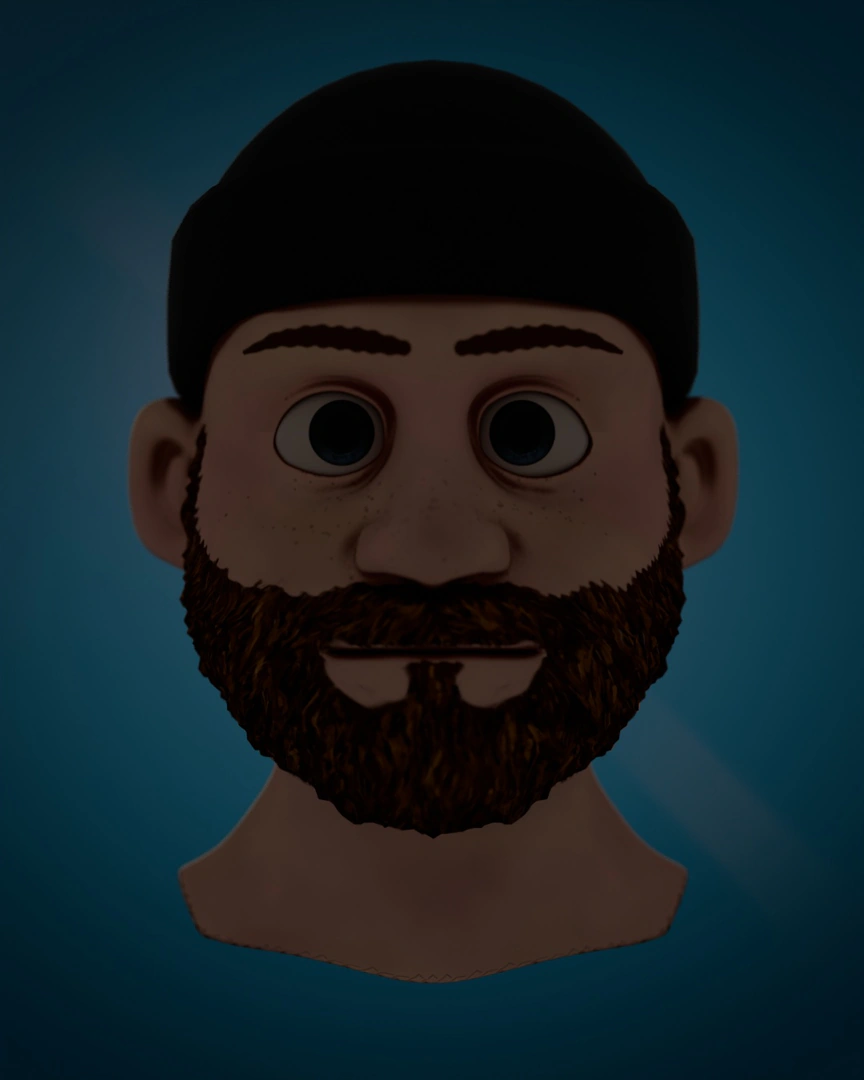
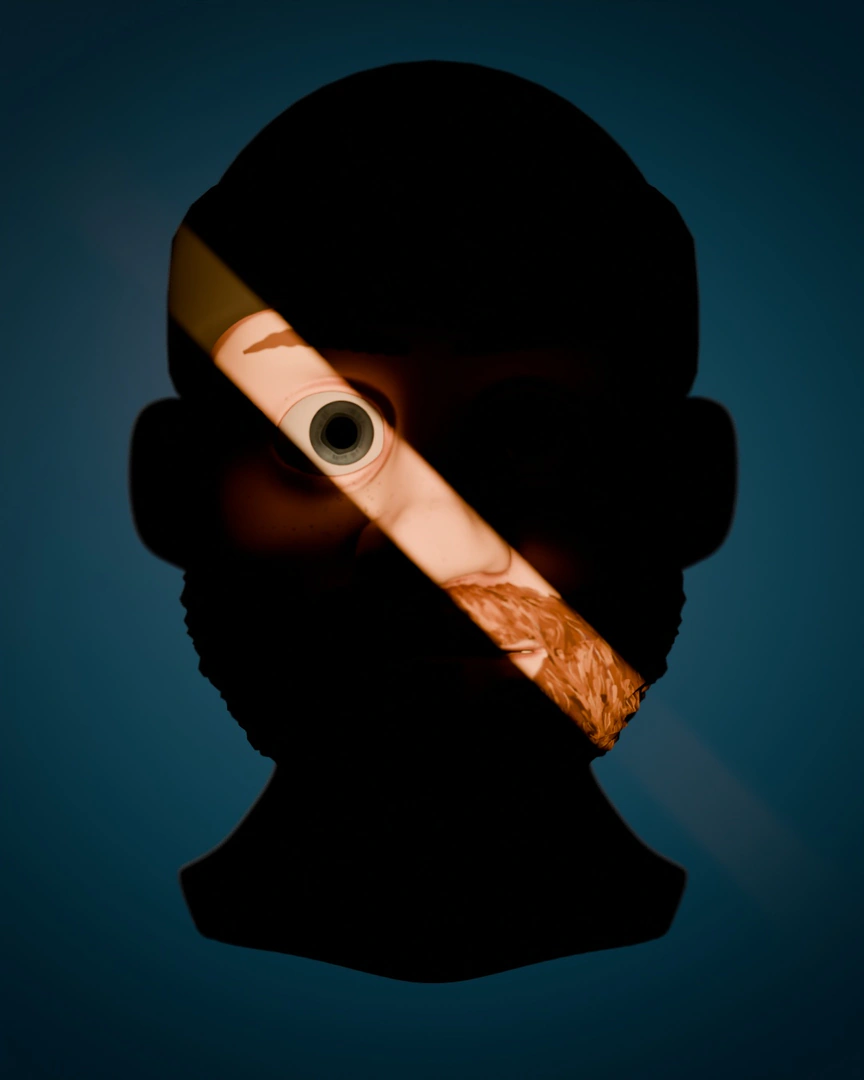
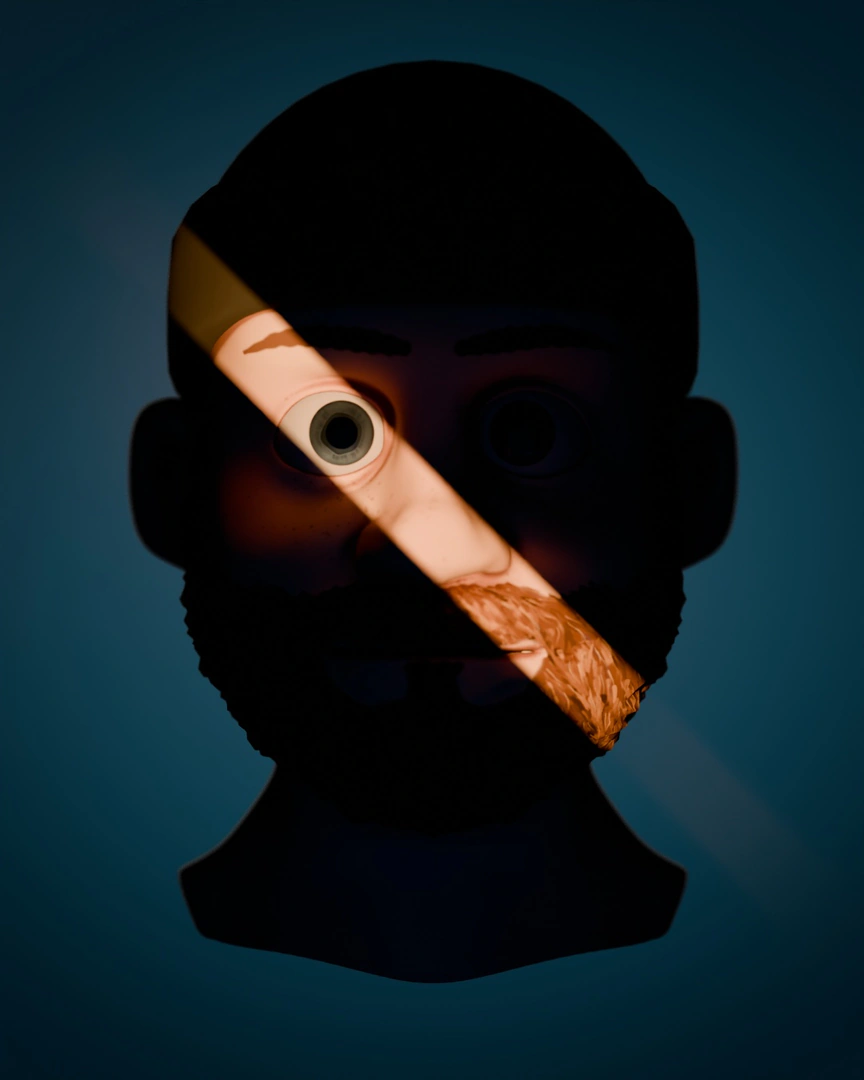
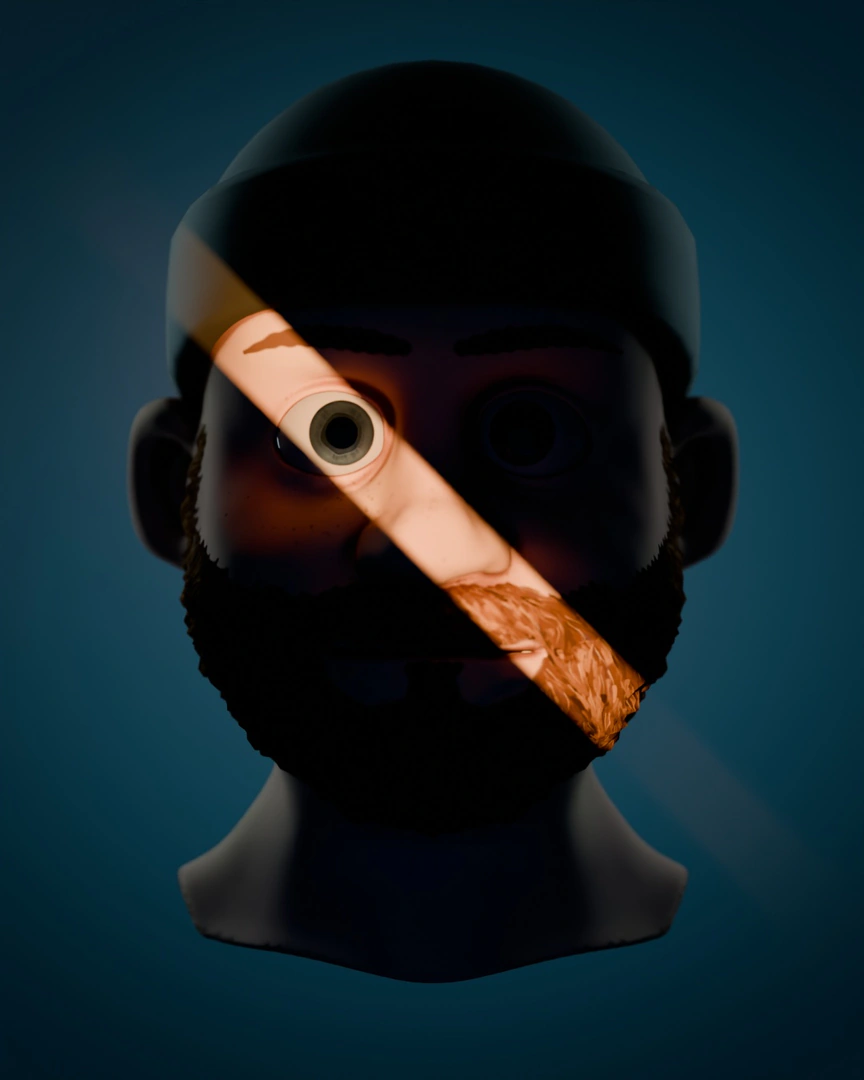
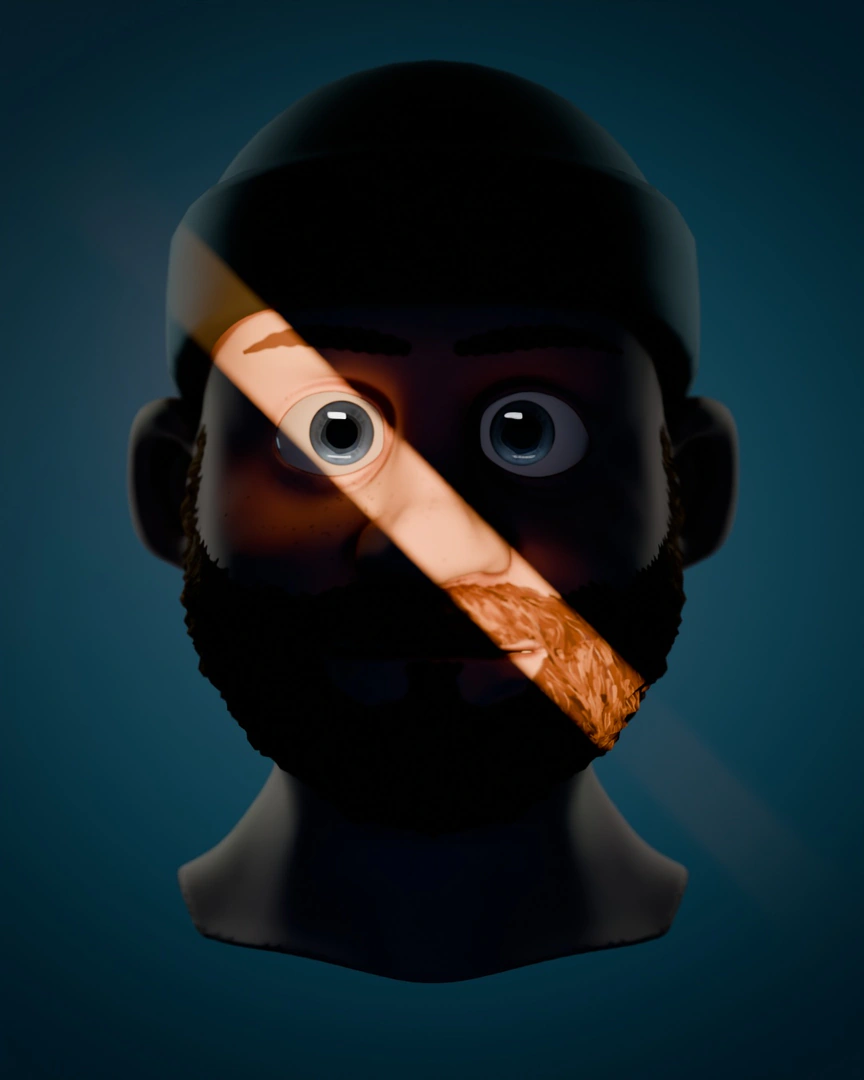
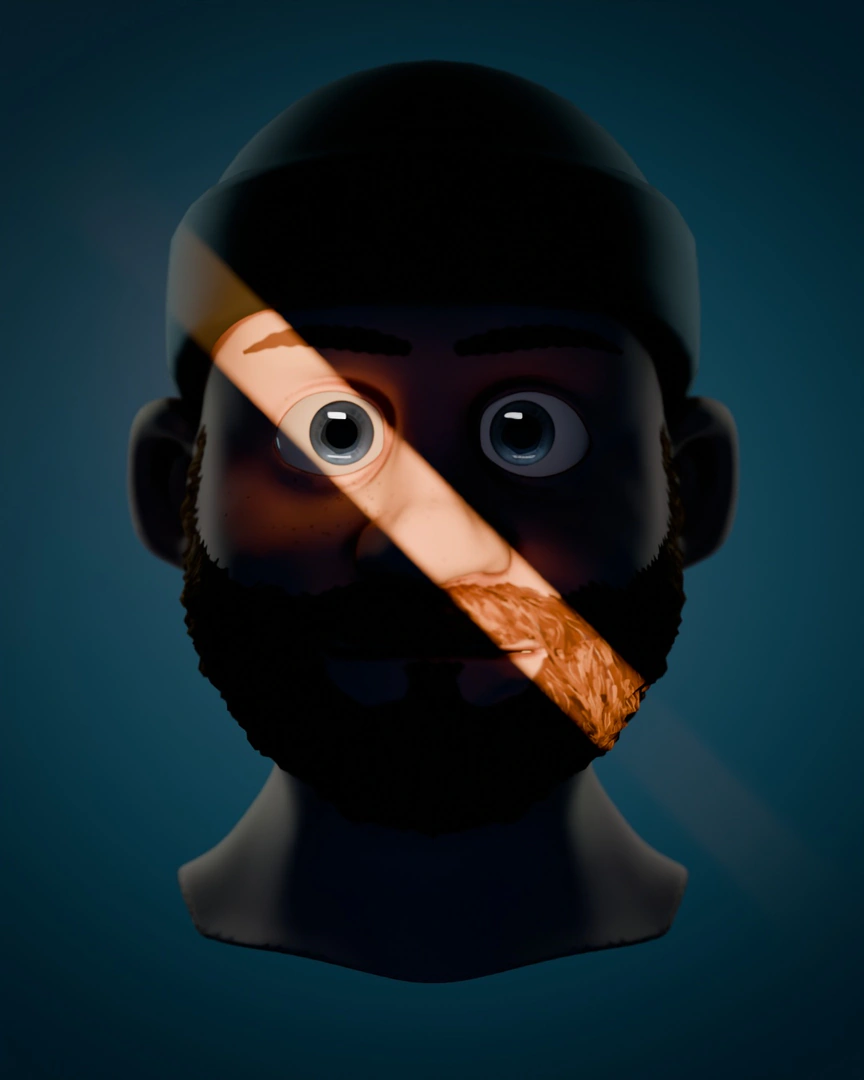
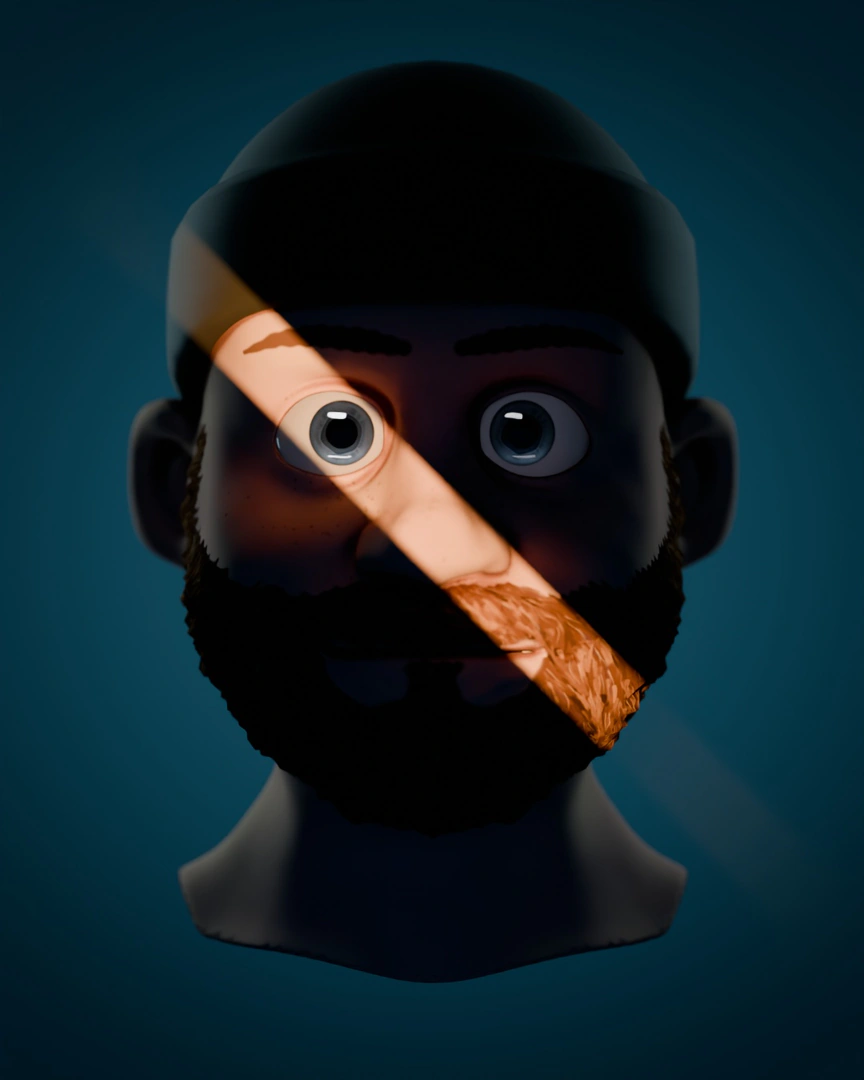
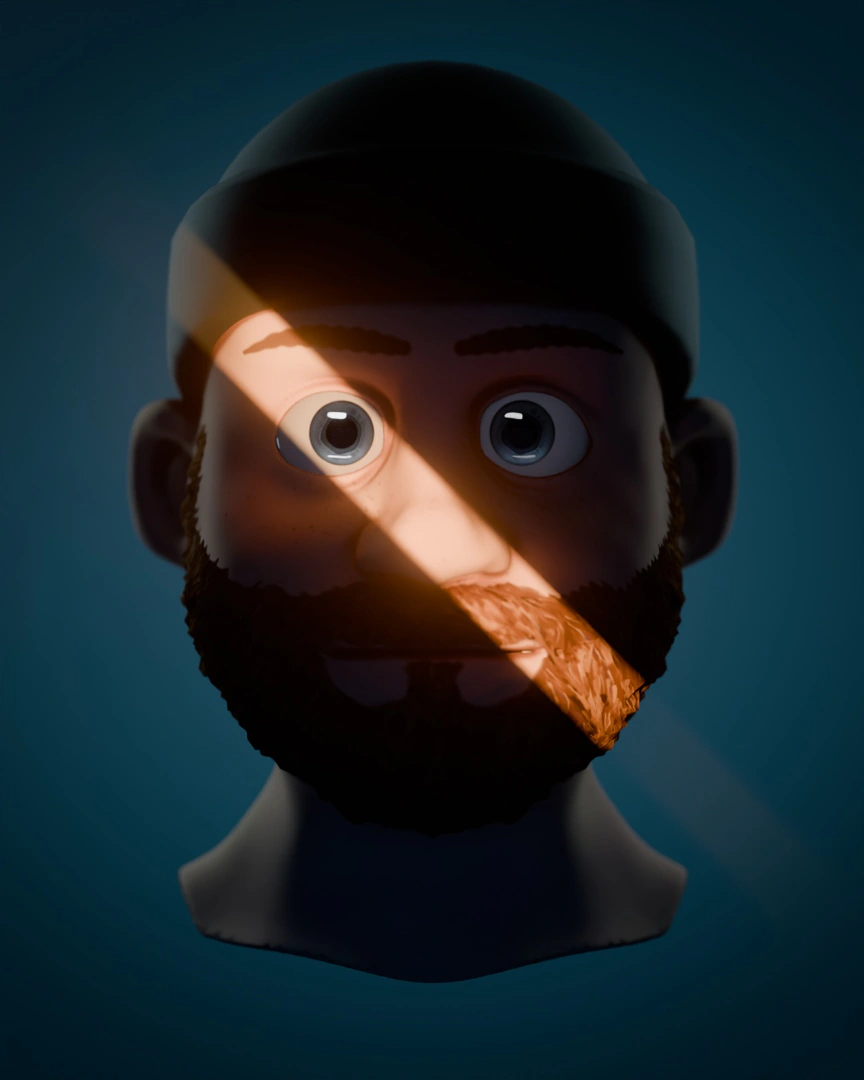
No lighting.
Pl. 15The shot built lamp by lamp. Each frame reloads the file so that no pass bleeds into the next.
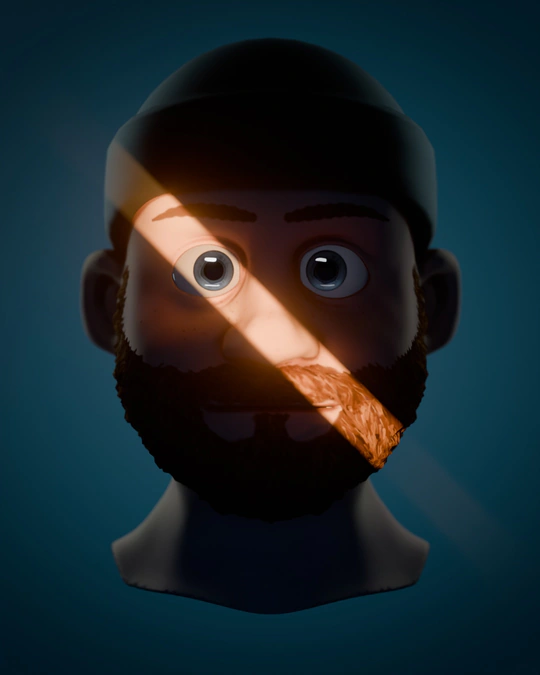
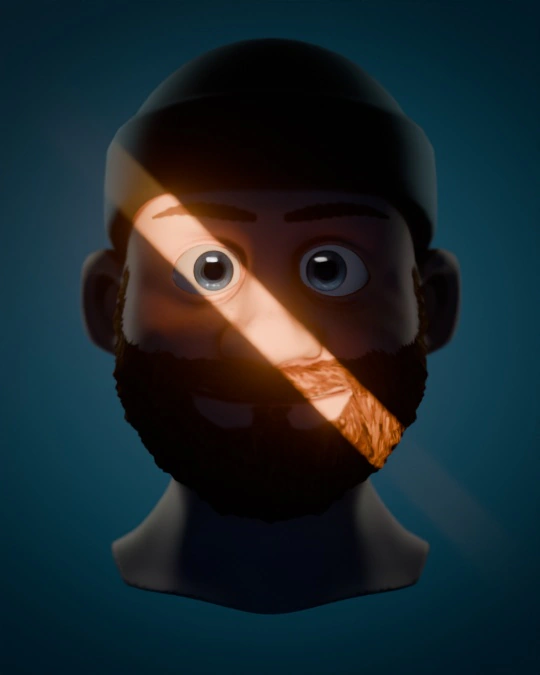
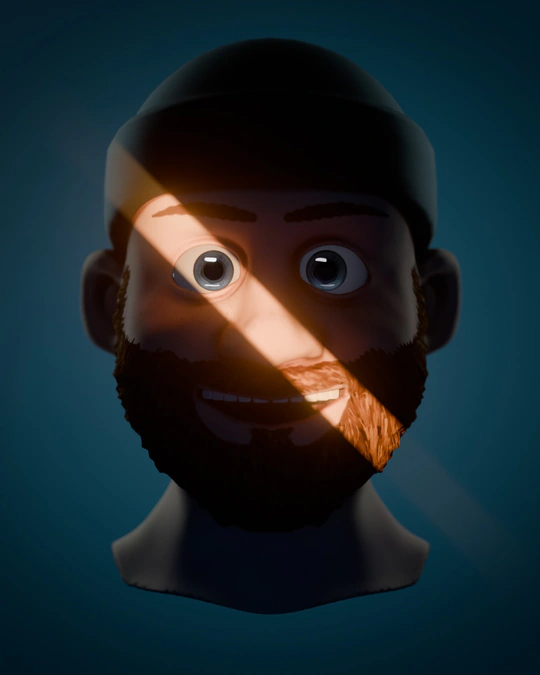
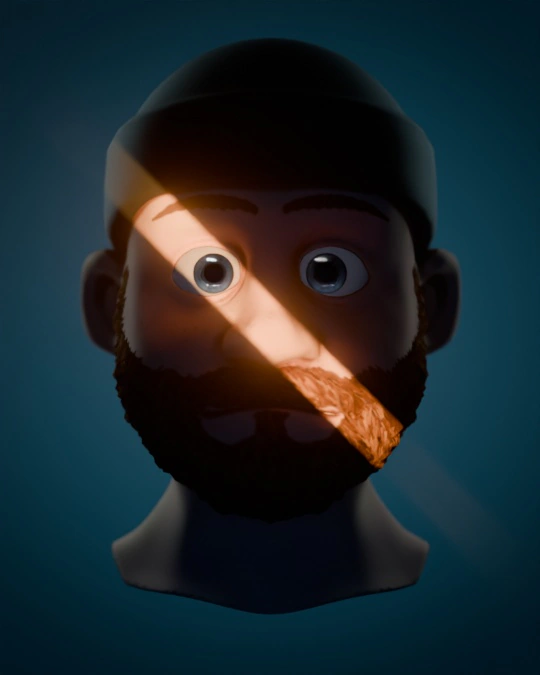
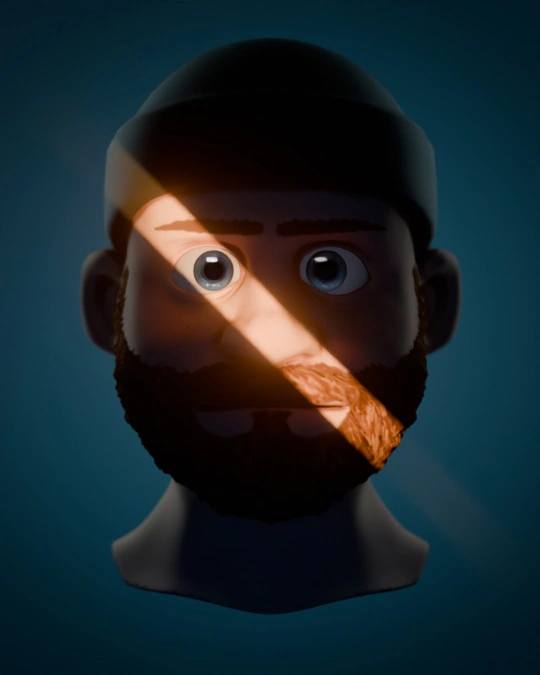
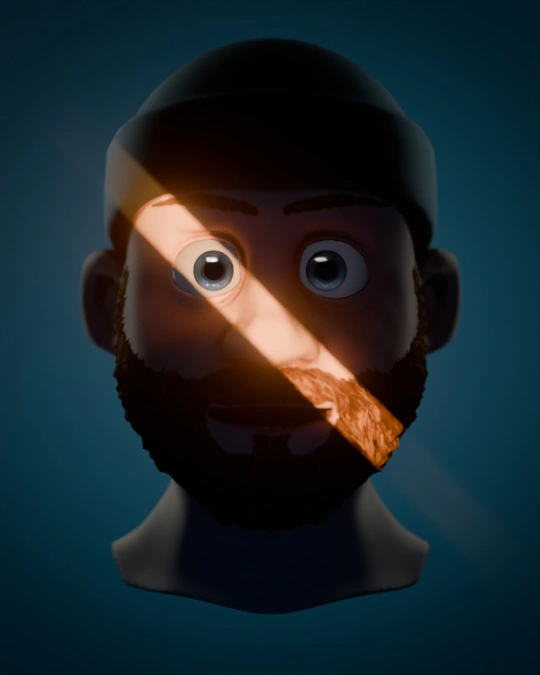
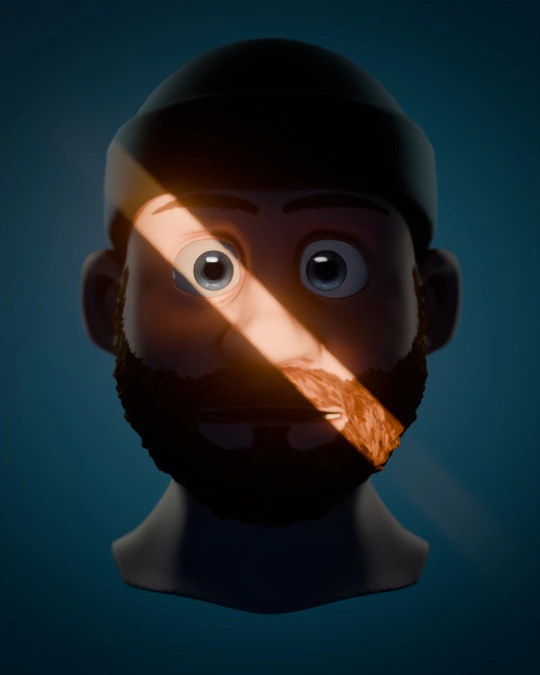
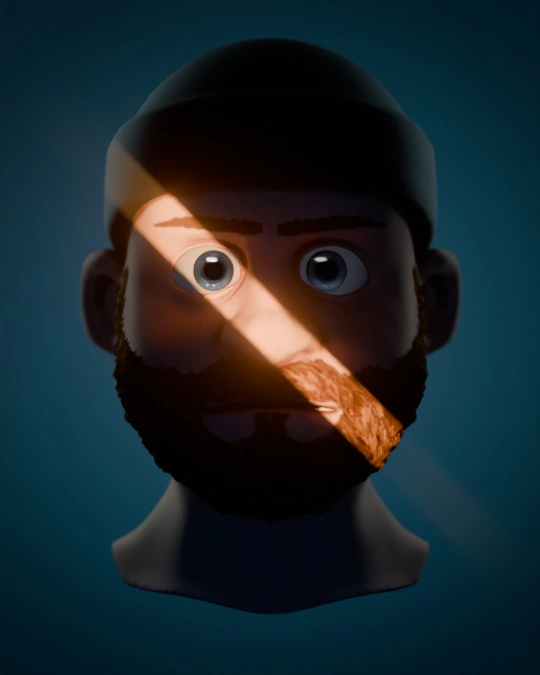
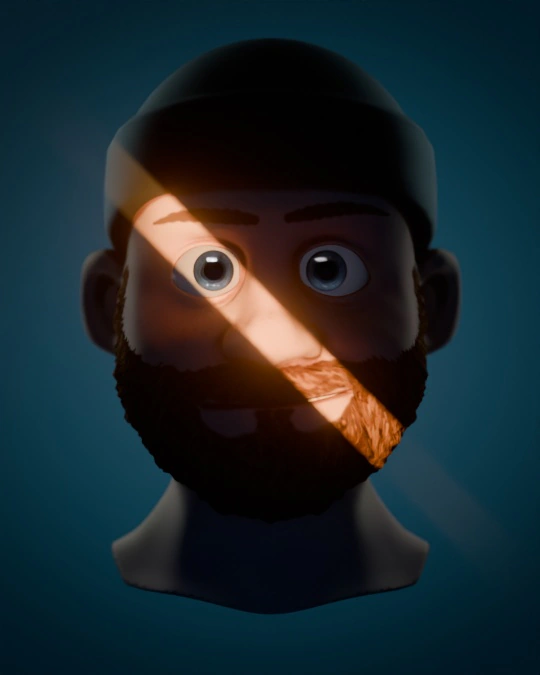
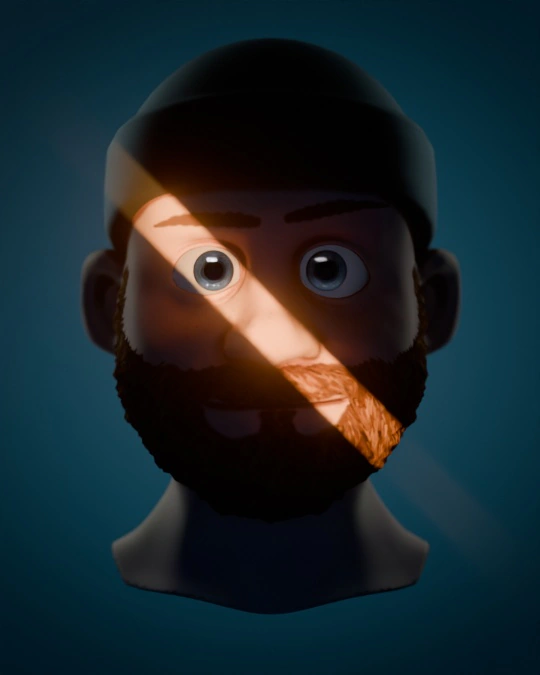
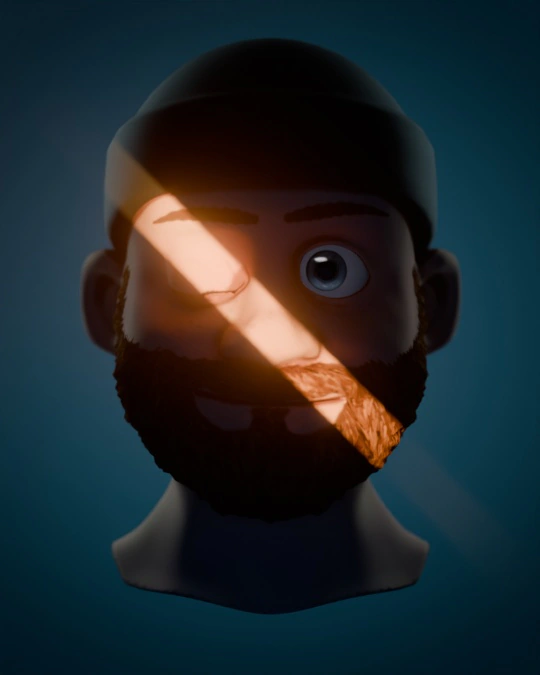
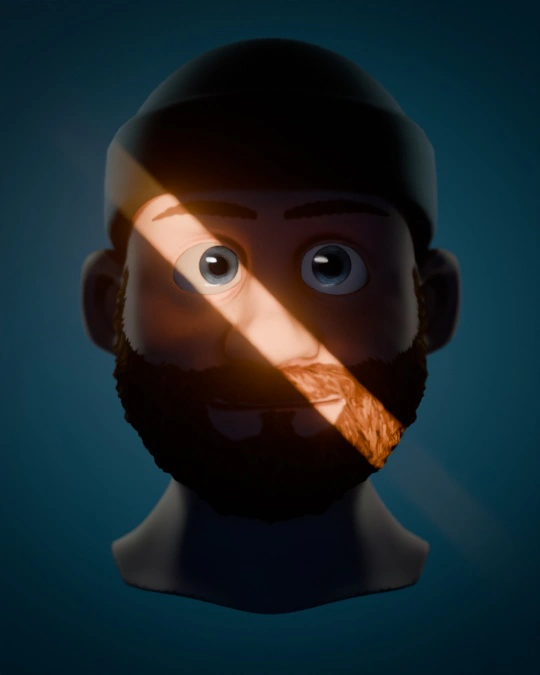
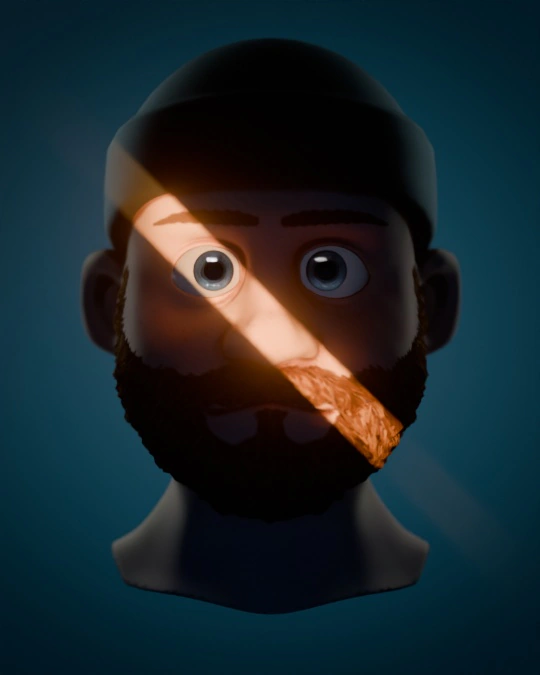
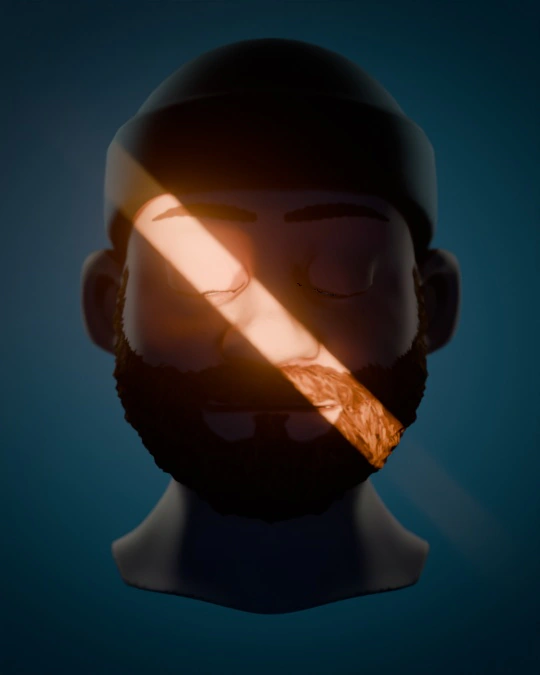
Pl. 16The library’s 14 expressions, in the calm lighting.
Chapter 05 / 07
From Cycles to HDRP
The goal was not “roughly the same” but the same pixel value before tone mapping. The whole scene is exported from Blender (model, baked textures, lights, camera, bloom) and rebuilt in HDRP by a C# builder, in physical units.
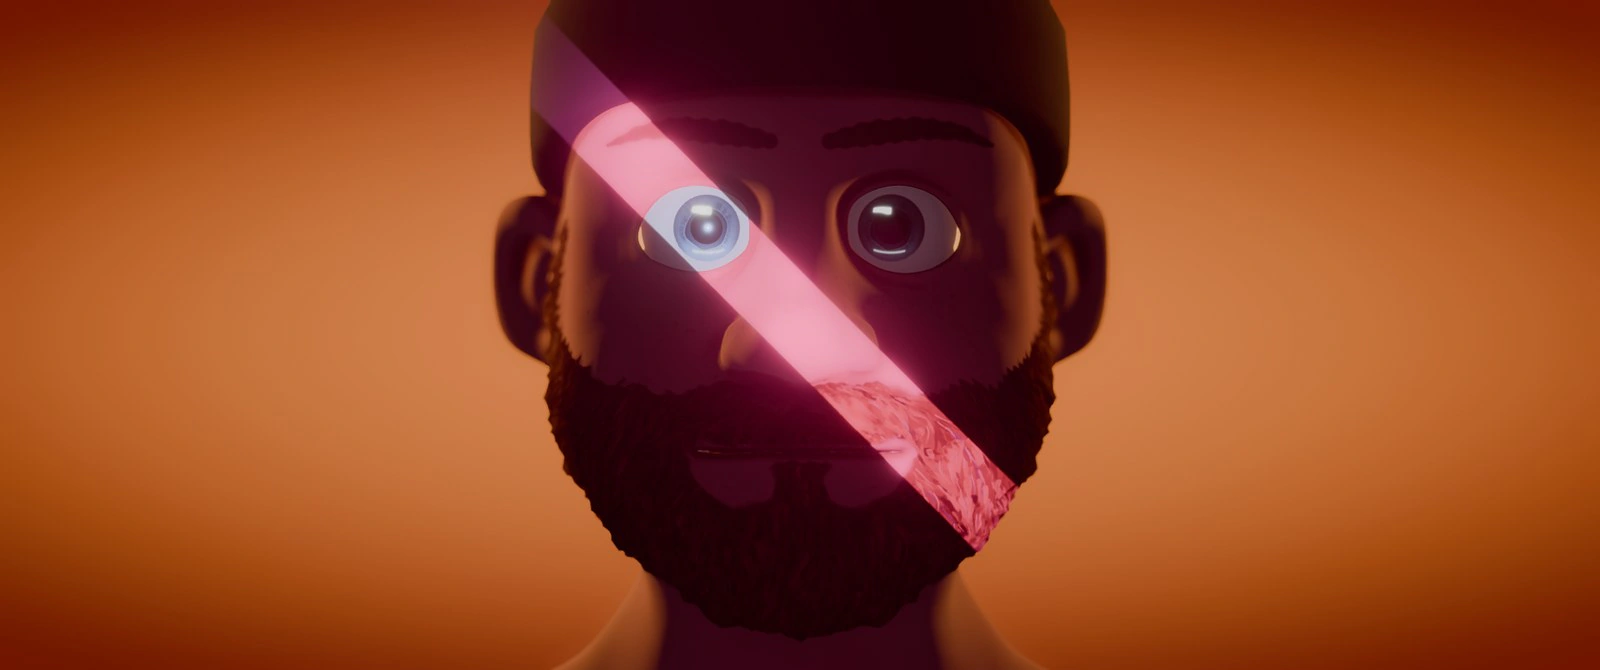
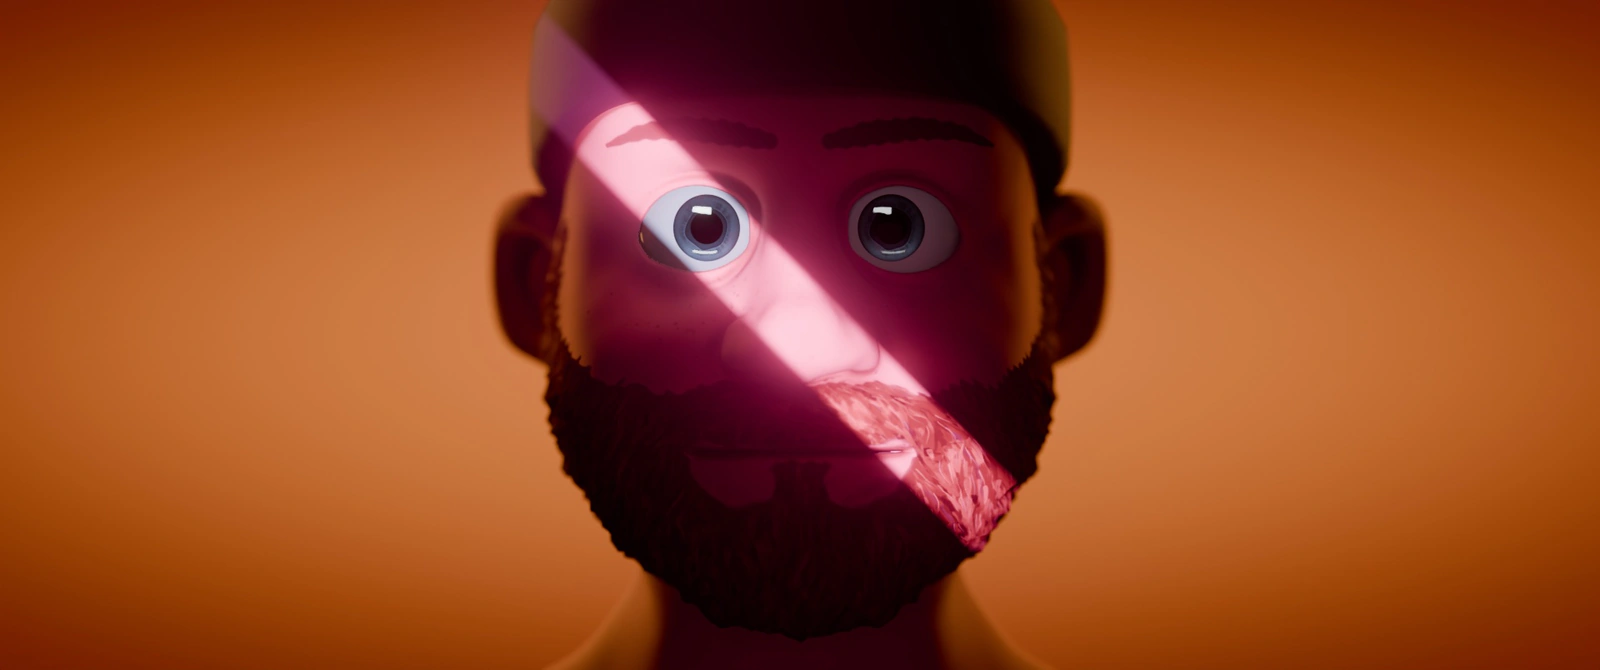 Blender CyclesUnity HDRP
| Blender (Cycles) | HDRP | Conversion |
|---|---|---|
| Power in watts | Lumens | 1 W = 683 lm, fixed EV100 = log2(683 / 1.2) ≈ 9.15 |
| Light linking | Rendering Layers | Eyes, eye band, eye shadow |
| Slit card | Spot cookie | 1024 texture generated on export |
| Is Camera Ray | Gradient Sky + Custom Pass | Visible background ≠ ambient |
| AgX – Punchy | External tonemapping | 32³ LUT produced by Blender’s OCIO |
| 135 mm f/1.4 camera | Physical camera | Physical DOF, 2.39:1 letterboxed |
Blender’s Tiny Eye eyes have a glass cornea that reveals the recessed iris: only a refracting renderer shows it. On export, each cornea texel casts a refracted ray (Snell, IOR 1.376) to the iris mesh and reads its colour. The eyeball texture then contains the iris seen through the cornea, and works as-is in EEVEE, Unity or the web.
Other traps: two overlapping UV layers (a blocky texture, first mistaken for a normals issue), and a fixed 50 % knee on HDRP’s bloom threshold, which made the Studio’s white background glow and veiled the whole face.
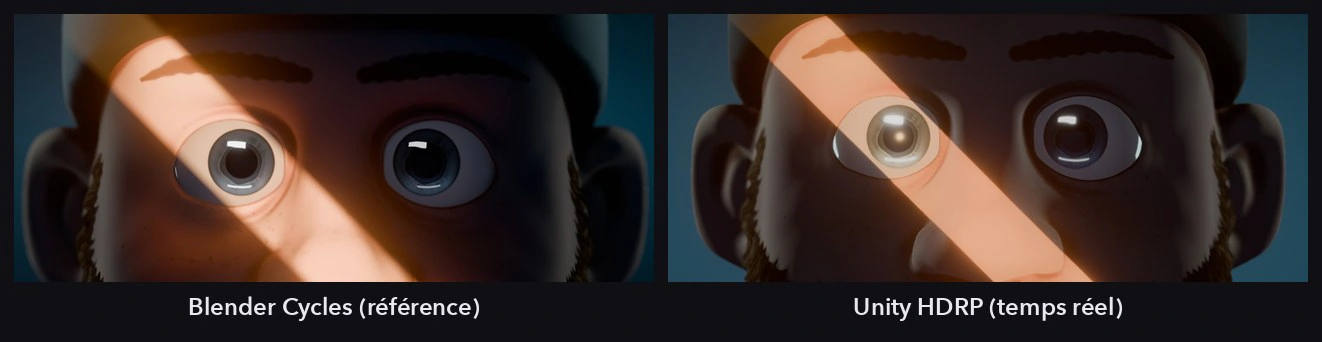
The three lighting setups blend into one another in Play mode. Light adds up: weighting each rig’s intensity gives a physically correct mix. Stacked Volumes get the weight w_k / (1 − Σ_{j>k} w_j), which reproduces exactly the weighted sum of the profiles. LUTs do not interpolate in HDRP: the switcher blends them itself into a Texture3D on a hidden Volume.
A transition dropped the editor to 3 frames per second. The culprit was neither the lights nor the LUT, but the sky: while blending, it changes every frame and HDRP recomputes its reflection (cubemap, convolution, probe) at 1024, i.e. 584 ms. A smooth gradient that only the eyes reflect needs no more than 128: 26 frames per second during transitions.
| Play mode | Before | After |
|---|---|---|
| Fixed lighting | 30 fps | 30 fps |
| Arcane → Studio | 3.5 fps | 26 fps |
| Sky reflection, per update | 584 ms (1024) | 53 ms (128) |
| LUT blend, per frame | 2,9 ms | 1,2 ms |
HDRP’s Studio stayed flat on the shadow side. Light by light, each rendered alone in Cycles and in HDRP, the culprit showed: area-light shadows. HDRP renders them with a 120° cone by default, in which the head fills only a tenth of the map. The builder now computes, for each area light, the tightest cone that contains the head (+15 % for capture motion): 10° for the key, about ten times more useful texels, and crisp PCSS shadows again. Mean luminance gap on the face: 14.3 → 6.5.
Chapter 06 / 07
Lending a face
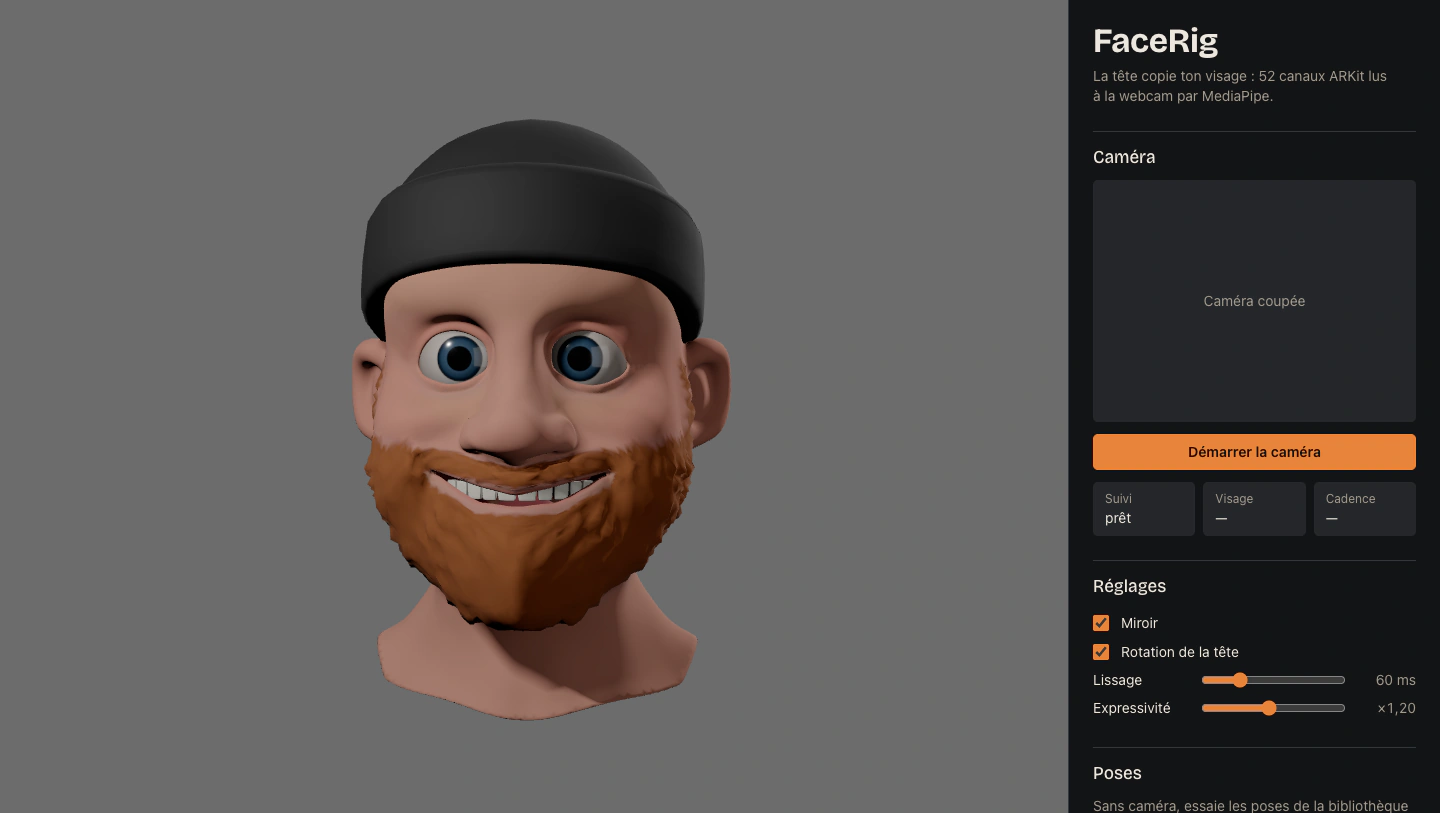
The 52 ARKit shape keys are a contract: anything that outputs those 52 values can drive the head. Three sources did, in order: a web page with a webcam, the iPhone app in Unity, then the webcam in Unity, with emotion recognition on top.
In the browser, MediaPipe Face Landmarker outputs the 52 ARKit scores each frame and three.js applies them to the morph targets. glTF carries neither modifiers nor drivers: teeth and tongue are baked shape key by shape key, and every mesh with a jawOpen morph target receives the jawOpen value. The link is made by name. After prune and meshopt, the file goes from 38.4 MB to 4.4 MB.
The lighting is not tuned by eye: a script reads the Blender scene and writes it to lights.json. Cycles and three.js both work in radiance, so once the conversion factors are found there is nothing to adjust.
| Blender | three.js |
|---|---|
| Area light, P watts, area A | RectAreaLight with intensity P / (4 A) |
| Point or spot, P watts | Intensity P / (4π) |
| Per-light exposure (stops) | energy × 2^exposure |
| AgX view, exposure E | AgXToneMapping, 2^E × 0,92 |
To test without a human face, the head watches itself: a Blender render of an expression becomes a fake webcam feed in headless Chrome, and the browser head has to match it. The loop catches sign and side errors: MediaPipe’s “Left” is indeed the subject’s left, as in ARKit.
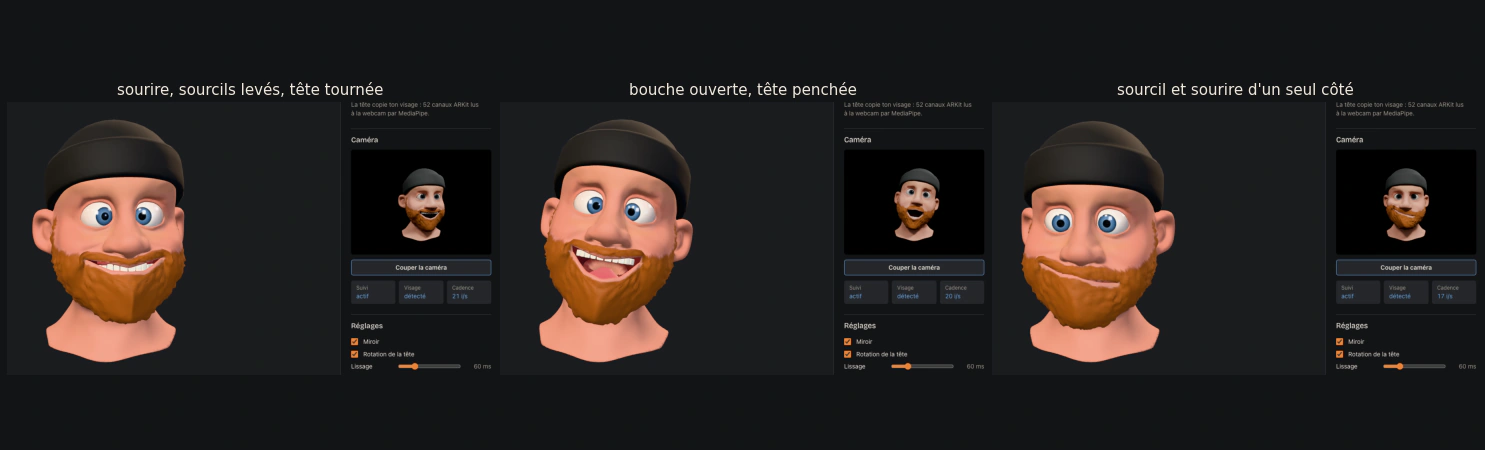
In Unity, the iPhone goes through Live Capture 4.0.1, which no longer compiles on Unity 6.5. I integrated it as source and ported it: 64-bit EntityId instead of instanceID, generic TreeView, Take Organizer tree rebuilt from paths. The mapper binds 69 blendshapes across 5 renderers by exact ARKit name matching.
The webcam reuses the web page’s system in a Python tracker (OpenCV + MediaPipe) that sends its packets to Unity over UDP. Webcam and iPhone go through the same One Euro filter: at rest, per-frame variation drops from 0.026 to 0.005; a jump is followed to 90 % within 100 ms.
iPhone ──Live Capture (port 9000)──► FaceActor ──► blendshapes + rotation (LiveCaptureHeadDriver)
webcam ──face_tracker.py (MediaPipe)──UDP 9100──► WebcamFaceDriver (EchoesHead)
                                   └─ HSEmotion, 1 frame in 3 ──► WebcamFaceReceiver.TryGetEmotion()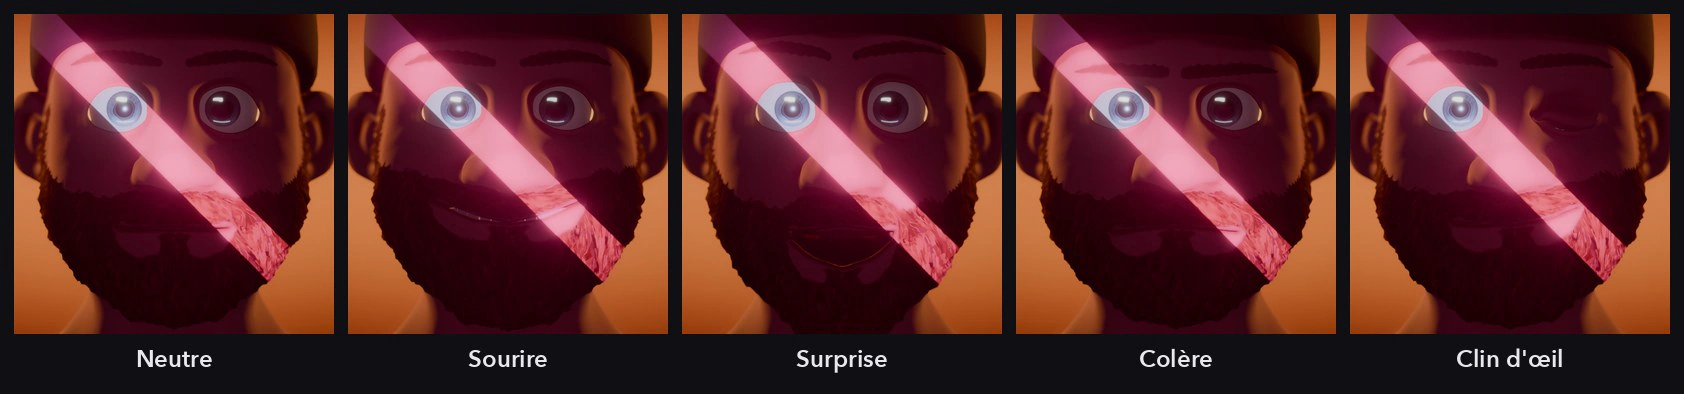
The 52 channels describe movements, not a state. To come back to the original idea, the tracker also classifies the face’s emotion with HSEmotion: 8 classes (anger, contempt, disgust, fear, happiness, neutral, sadness, surprise). The ONNX model runs in OpenCV DNN, already installed, without a single extra package, on the face cropped from the MediaPipe landmarks.
- 8
- AffectNet emotion classes, probabilities smoothed over 0.25 s.
- 33 ms
- Per inference on the Intel Mac: one frame in three, about 10 per second.
- 30 %
- Of the head rotation carried by the neck, the rest by the head.
Chapter 07 / 07
Under the hood
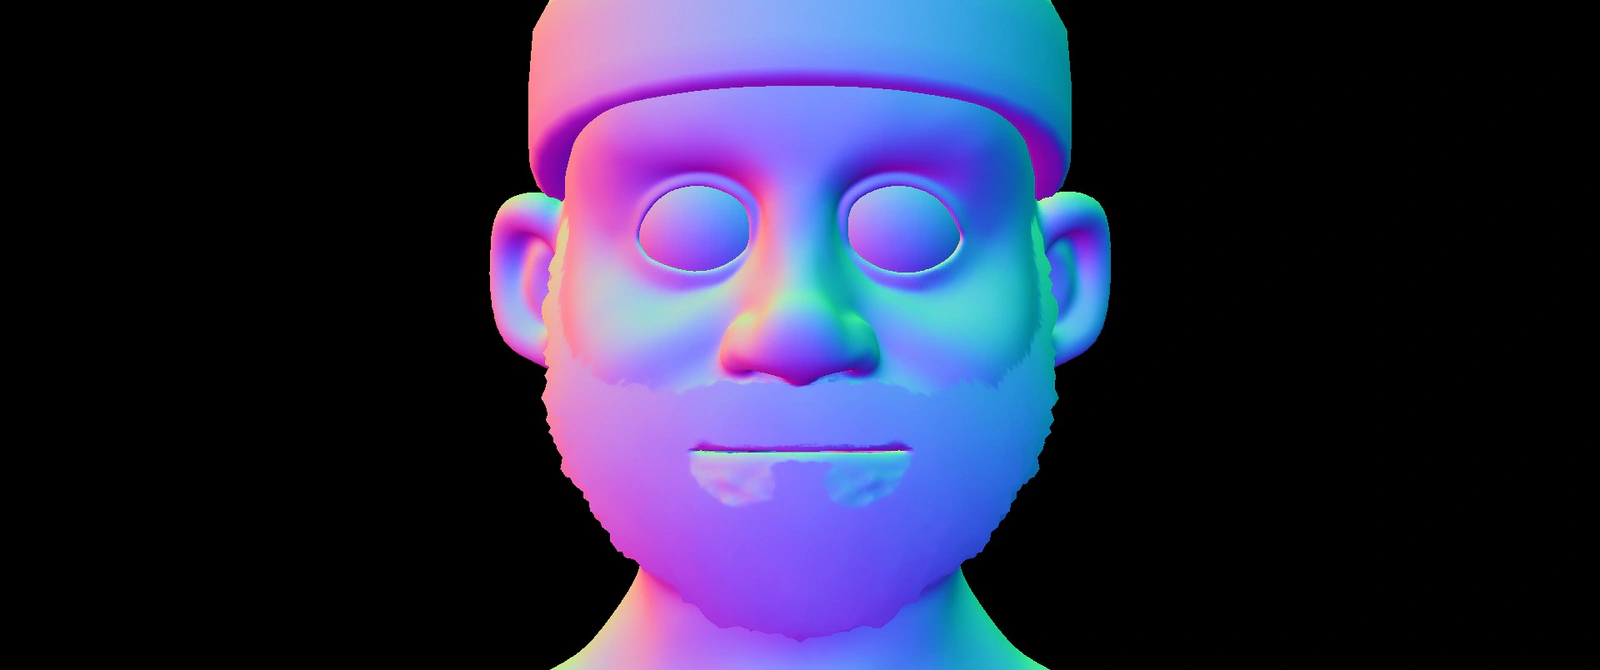
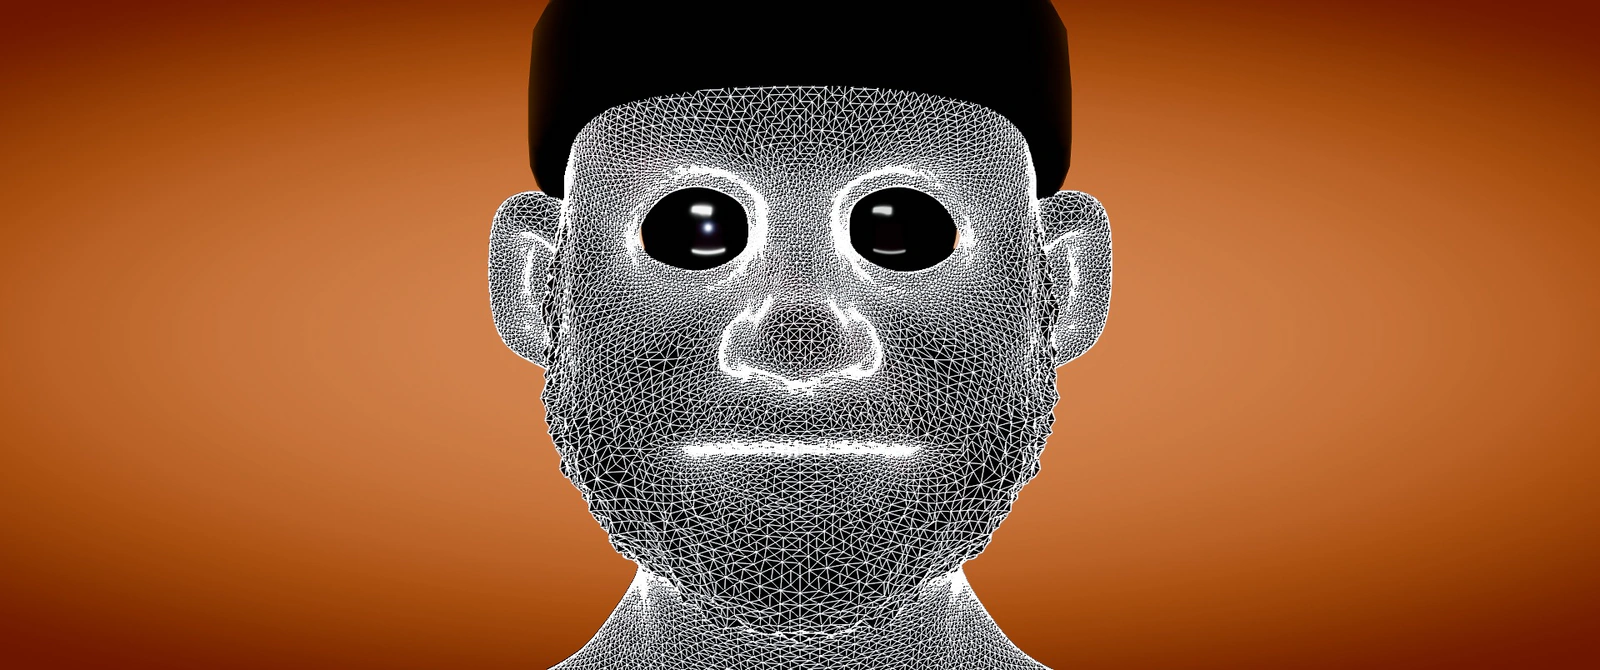
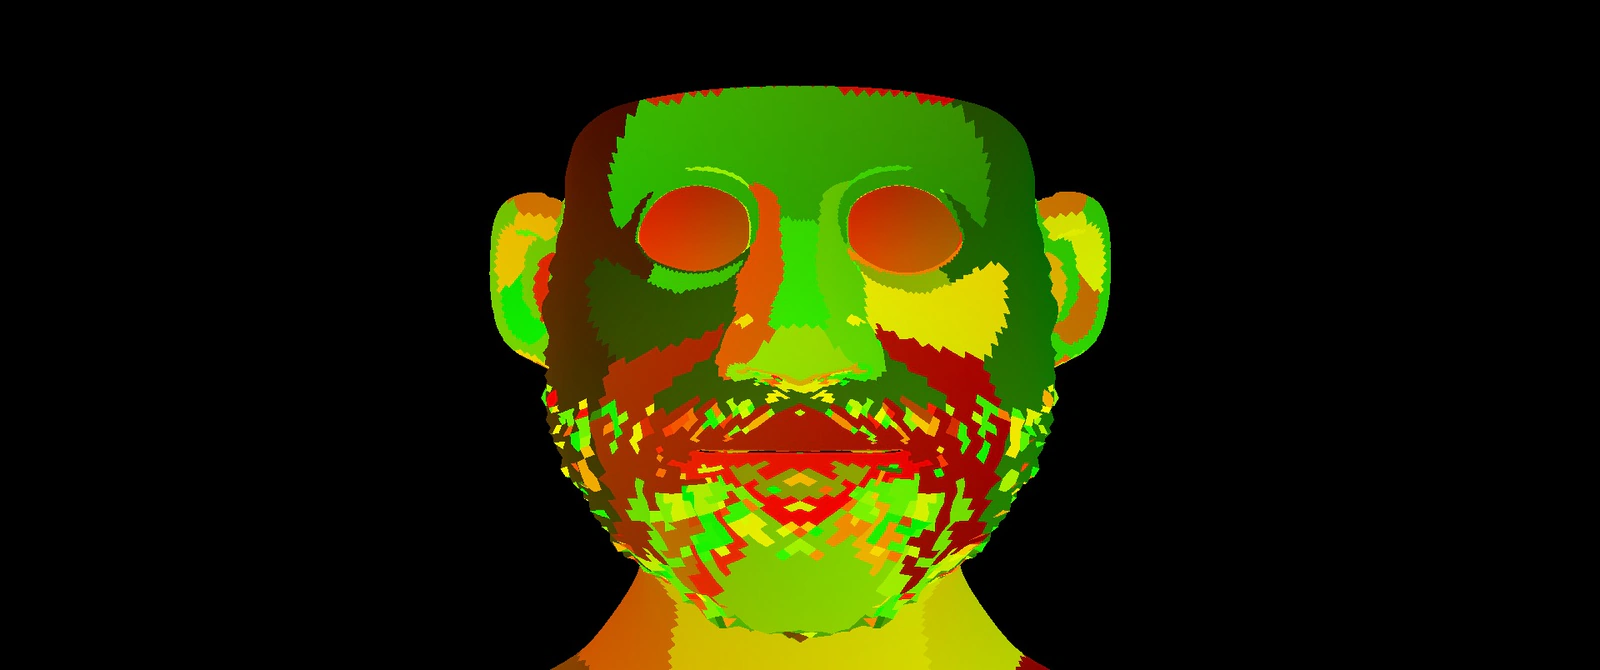
To check materials and intensities without opening the Rendering Debugger, the HDRP camera switches between 29 render passes, driven by script and exported with a contact sheet.
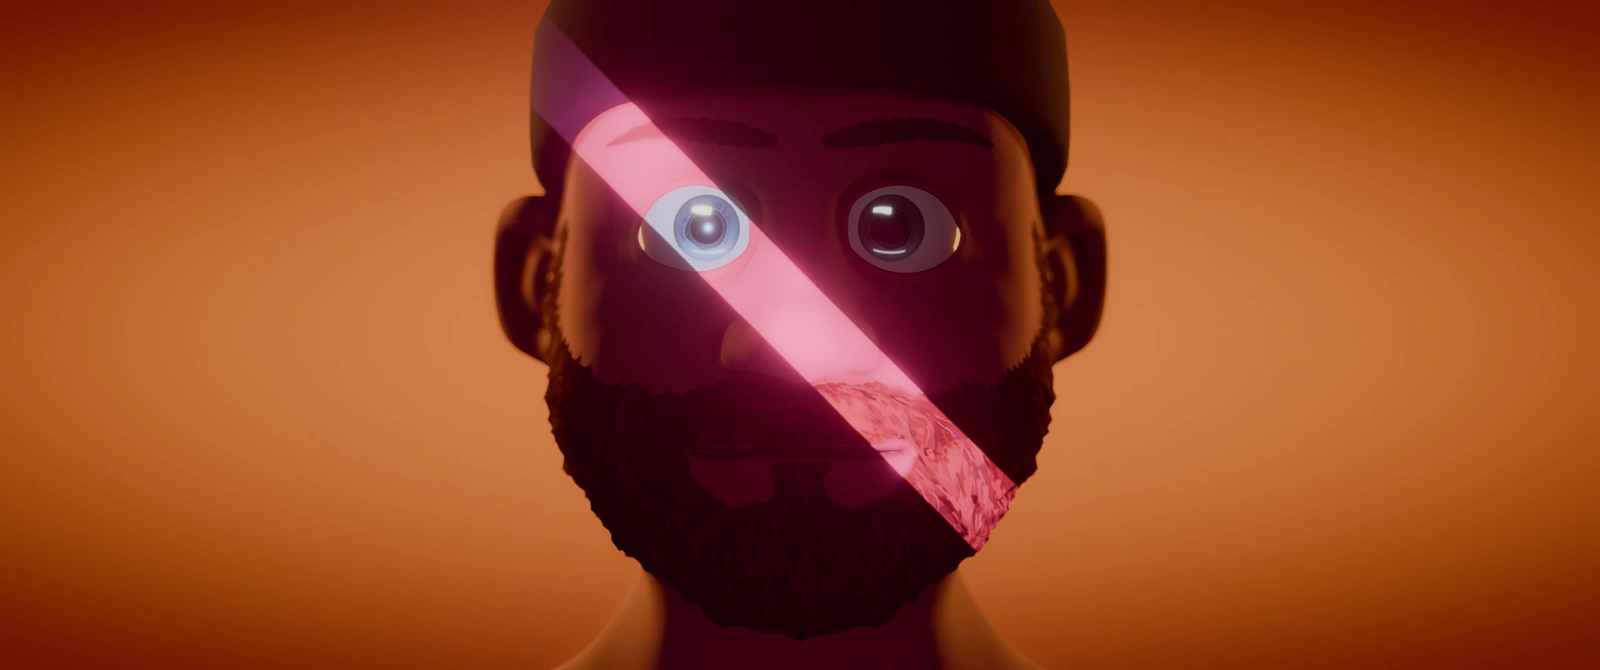
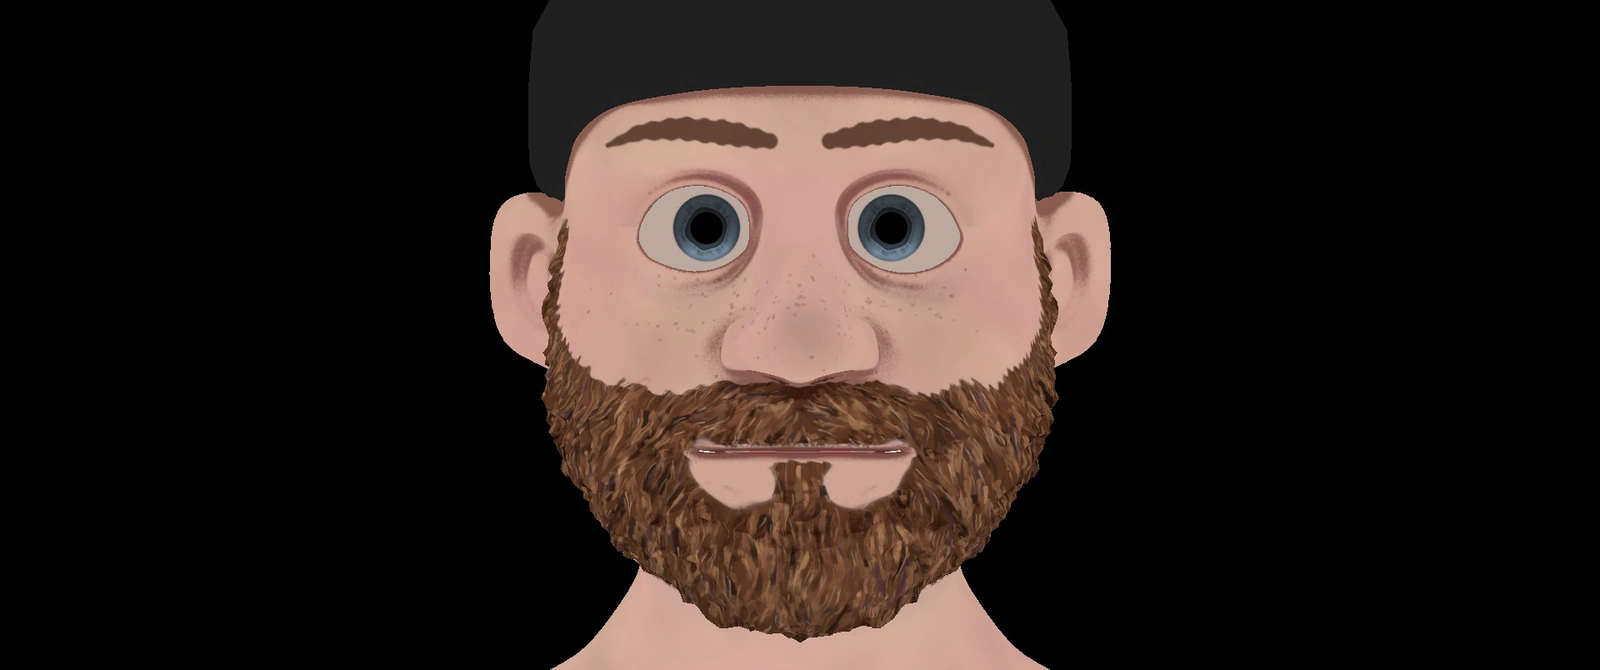
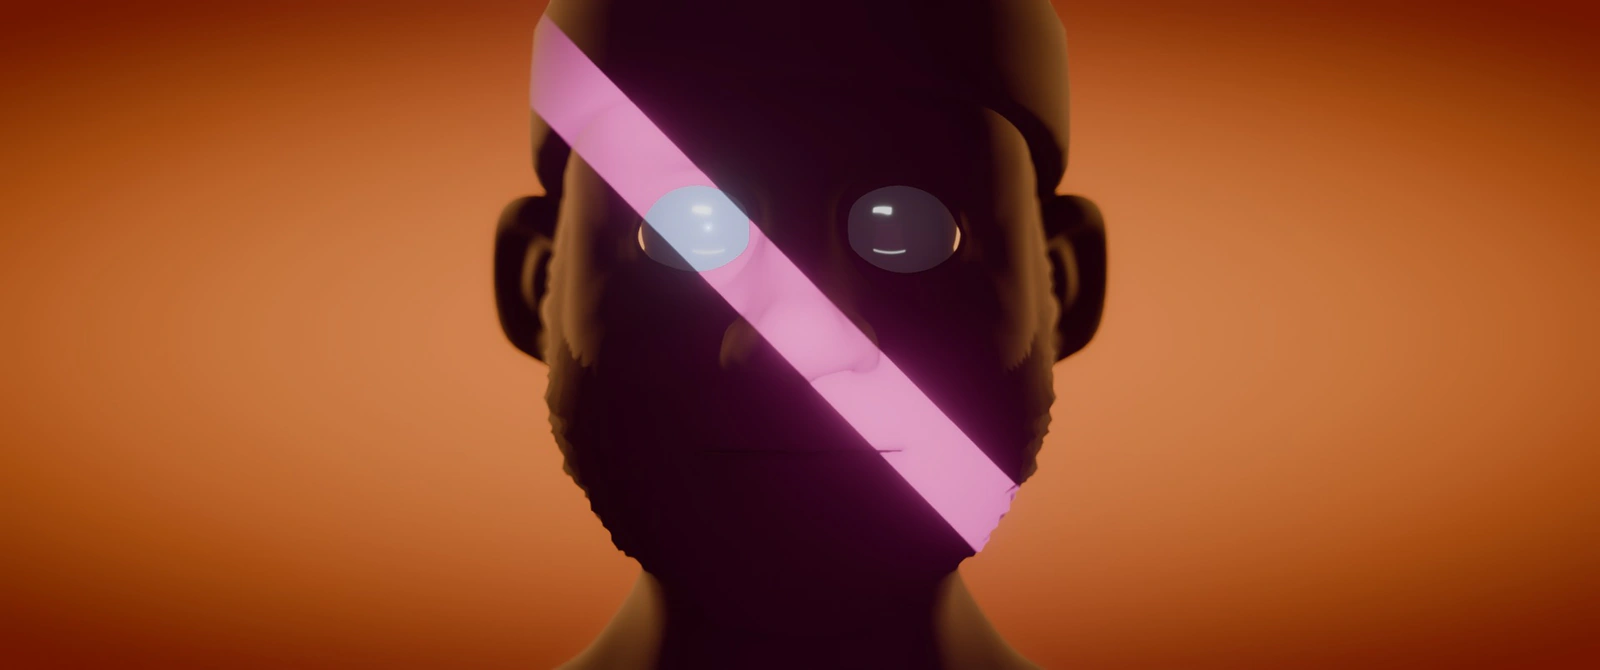
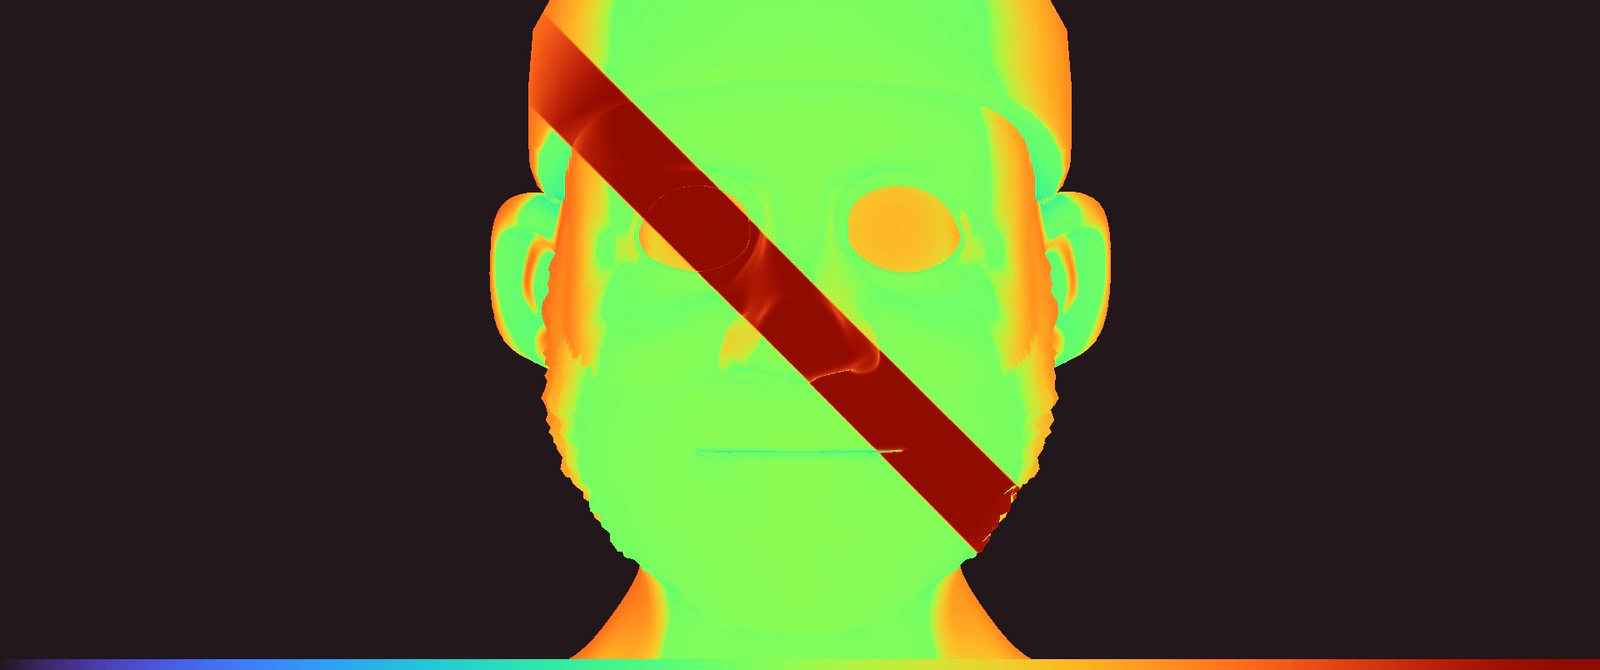
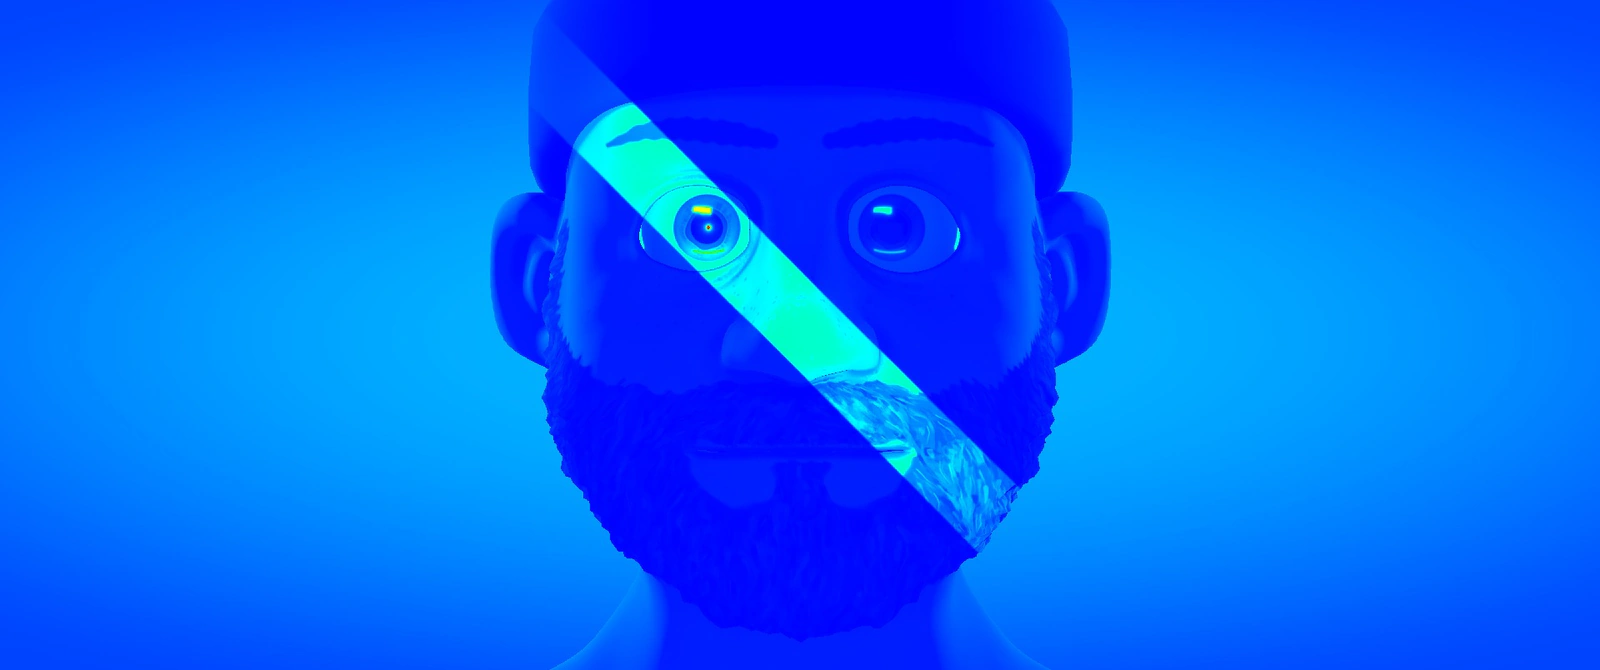
The final image.
Pl. 24Eight of the 29 passes, Arcane lighting, exported by RenderViewExporter.
GL.wireframe exists in HDRP but only draws forward passes: the head, in deferred, does not show. The wireframe is therefore a line mesh built per renderer, re-baked each frame with BakeMesh and offset by 0.4 mm along the normals. Lux and luminance saturate in 8 bits: they go through a float RenderTexture before being coloured.
The same repository opens on the Mac as on a Windows RTX workstation: when the editor loads, the HDRP assets switch to their ray-traced variant on Windows + DX12 + DXR, and back to the base assets on Metal.
- Project
- Personal project
- Period
- 12 → 15 November 2026
- Role
- Rig, lookdev, lighting, pipeline, development
- Log
- 8 Blender posts, 20 Unity devlog entries
- Blender 4.5 · Cycles
- Faceit
- Python · numpy
- three.js
- MediaPipe
- Unity 6.5 · HDRP 17.5
- C#
- Live Capture
- OpenCV DNN
- HSEmotion
What’s next: a 30-second dolly-in, from the wide shot to the eyes, on a laugh, already cut as a preview in the calm lighting. The channel ranges still need calibrating on real faces, webcam then iPhone, the One Euro filter tuning on a real capture, and the detected emotion wiring into the lighting: a switch from Arcane to Calm depending on the mood of the person in front. On the look side, the hair-by-hair beard is now the busiest part of the image; it will move to five or six large masses, like the eyebrows.

